Navigation and menu options will vary by device and/or operating system (PC, mobile, etc). Some menu selections may be grayed out or not shown, indicating the option is not supported on your device/system. Some menu options shown in these instructions may be not be available on your device.
To use the Snap-on Cloud:
| ● | The diagnostic tool must be connected to a Wi-Fi network, see the Wi-Fi Setup section in your diagnostic tool user manual. |
| ● | A Snap-on Profile Manager account is required, see New User - Create an Individual Account. |
| 1. | Once you have setup your Snap-on Profile Manager account, visit www.ALTUSDRIVE.com. |
| 2. | Select the Login icon. |
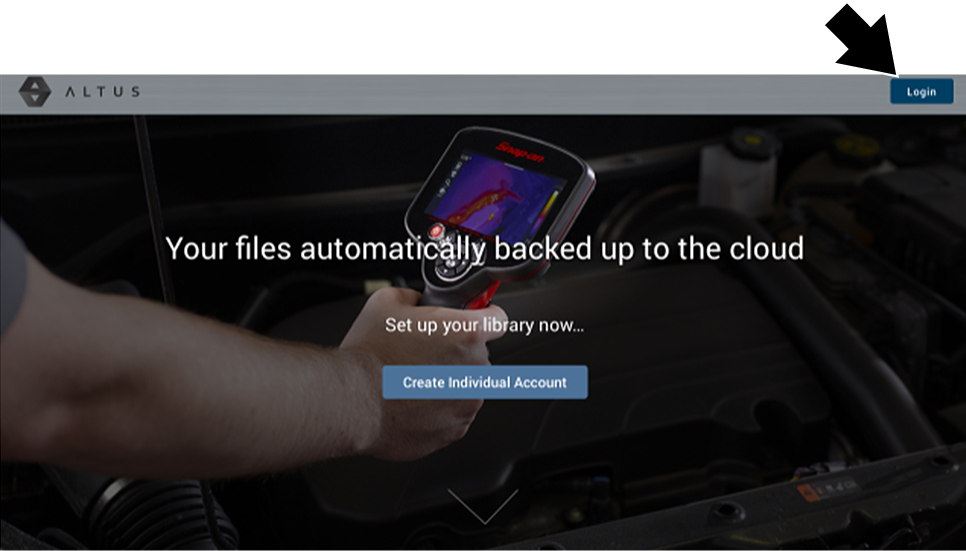
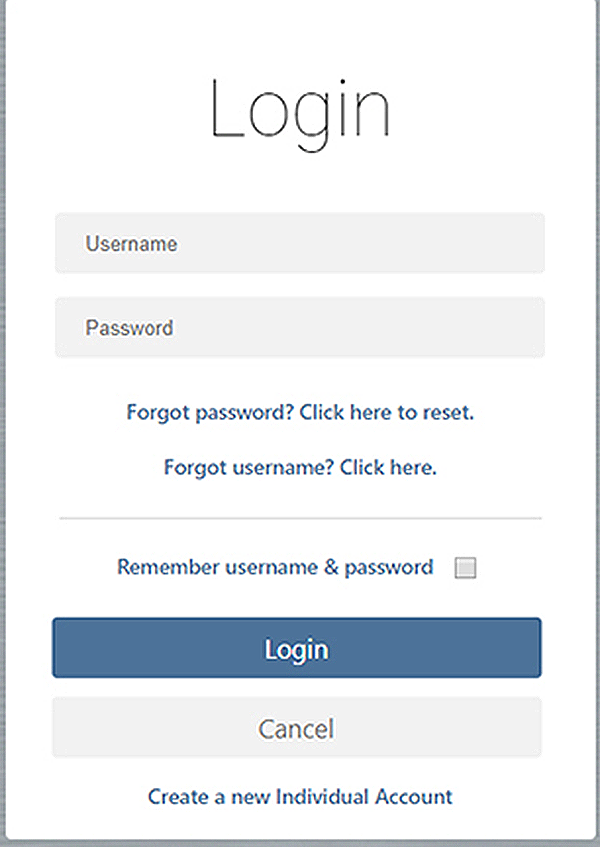
| 3. | Log in using your Snap-on Profile Manager Username and Password . |
The upper and lower toolbars are available from all screens.
The upper toolbar includes a menu icon (right side). This menu allows you to share your entire gallery, see Sharing all Reports (Share My Gallery) below in this section.

The lower toolbar includes the following links (see the following sections):
| ● | My Files |
| ● | Search |
| ● | Favorites |
| ● | Profile |

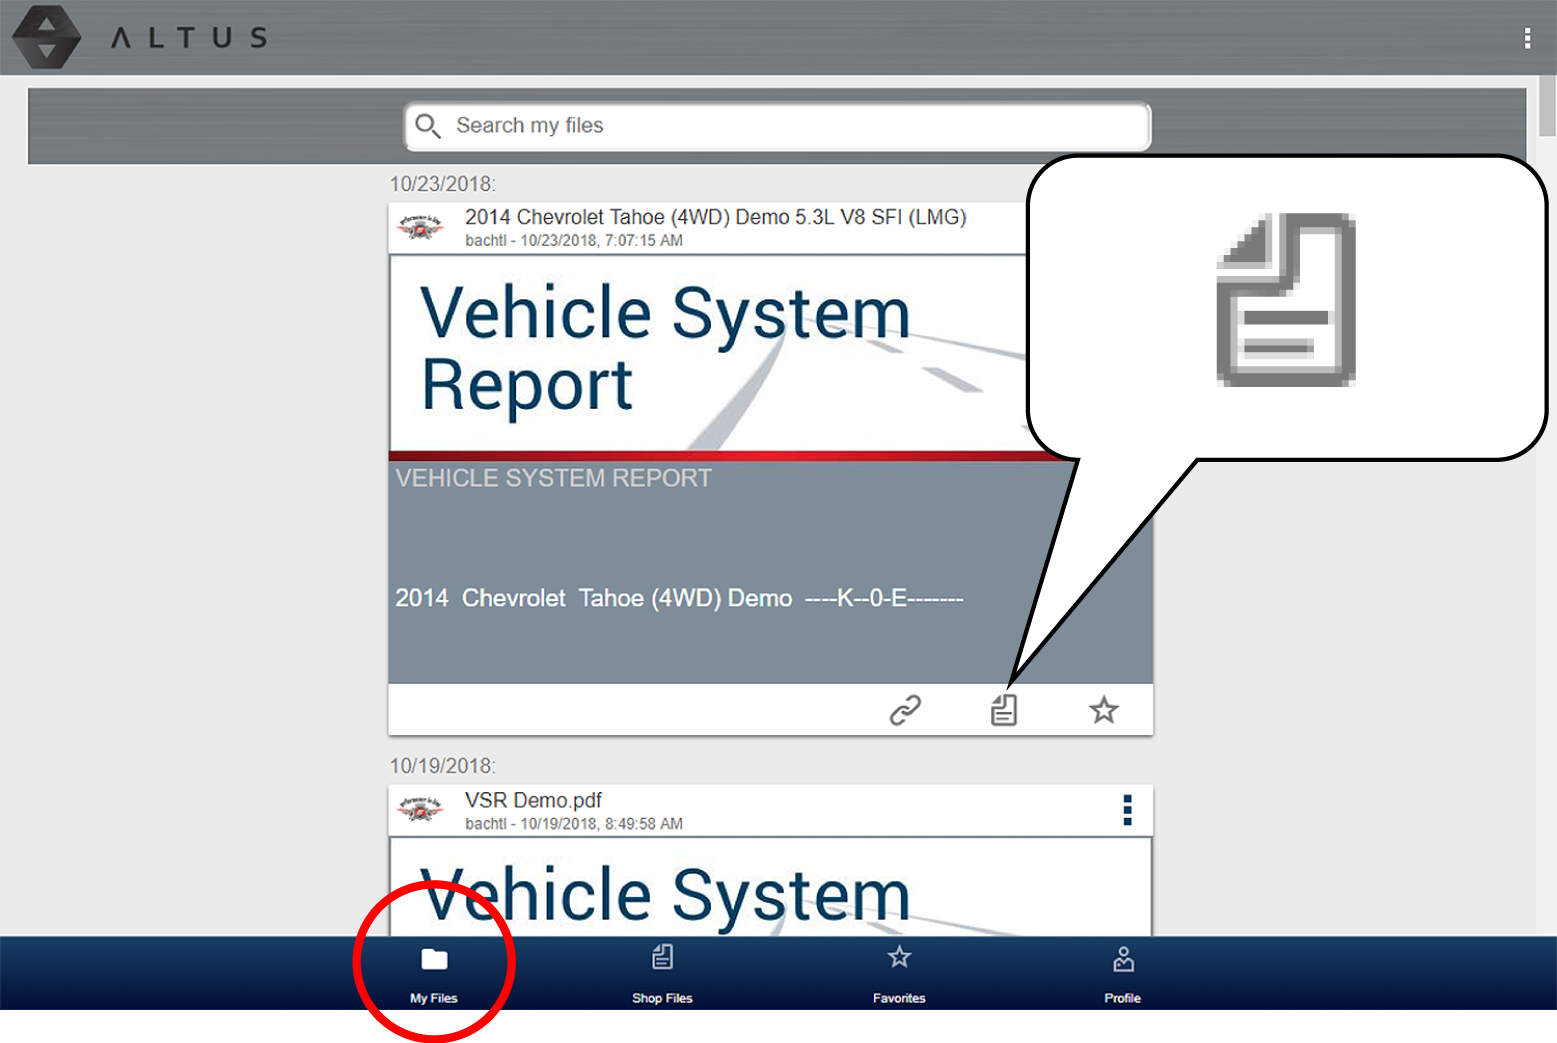
My Files displays all the code scan reports uploaded from the diagnostic tool . Each report is displayed in a navigation card.
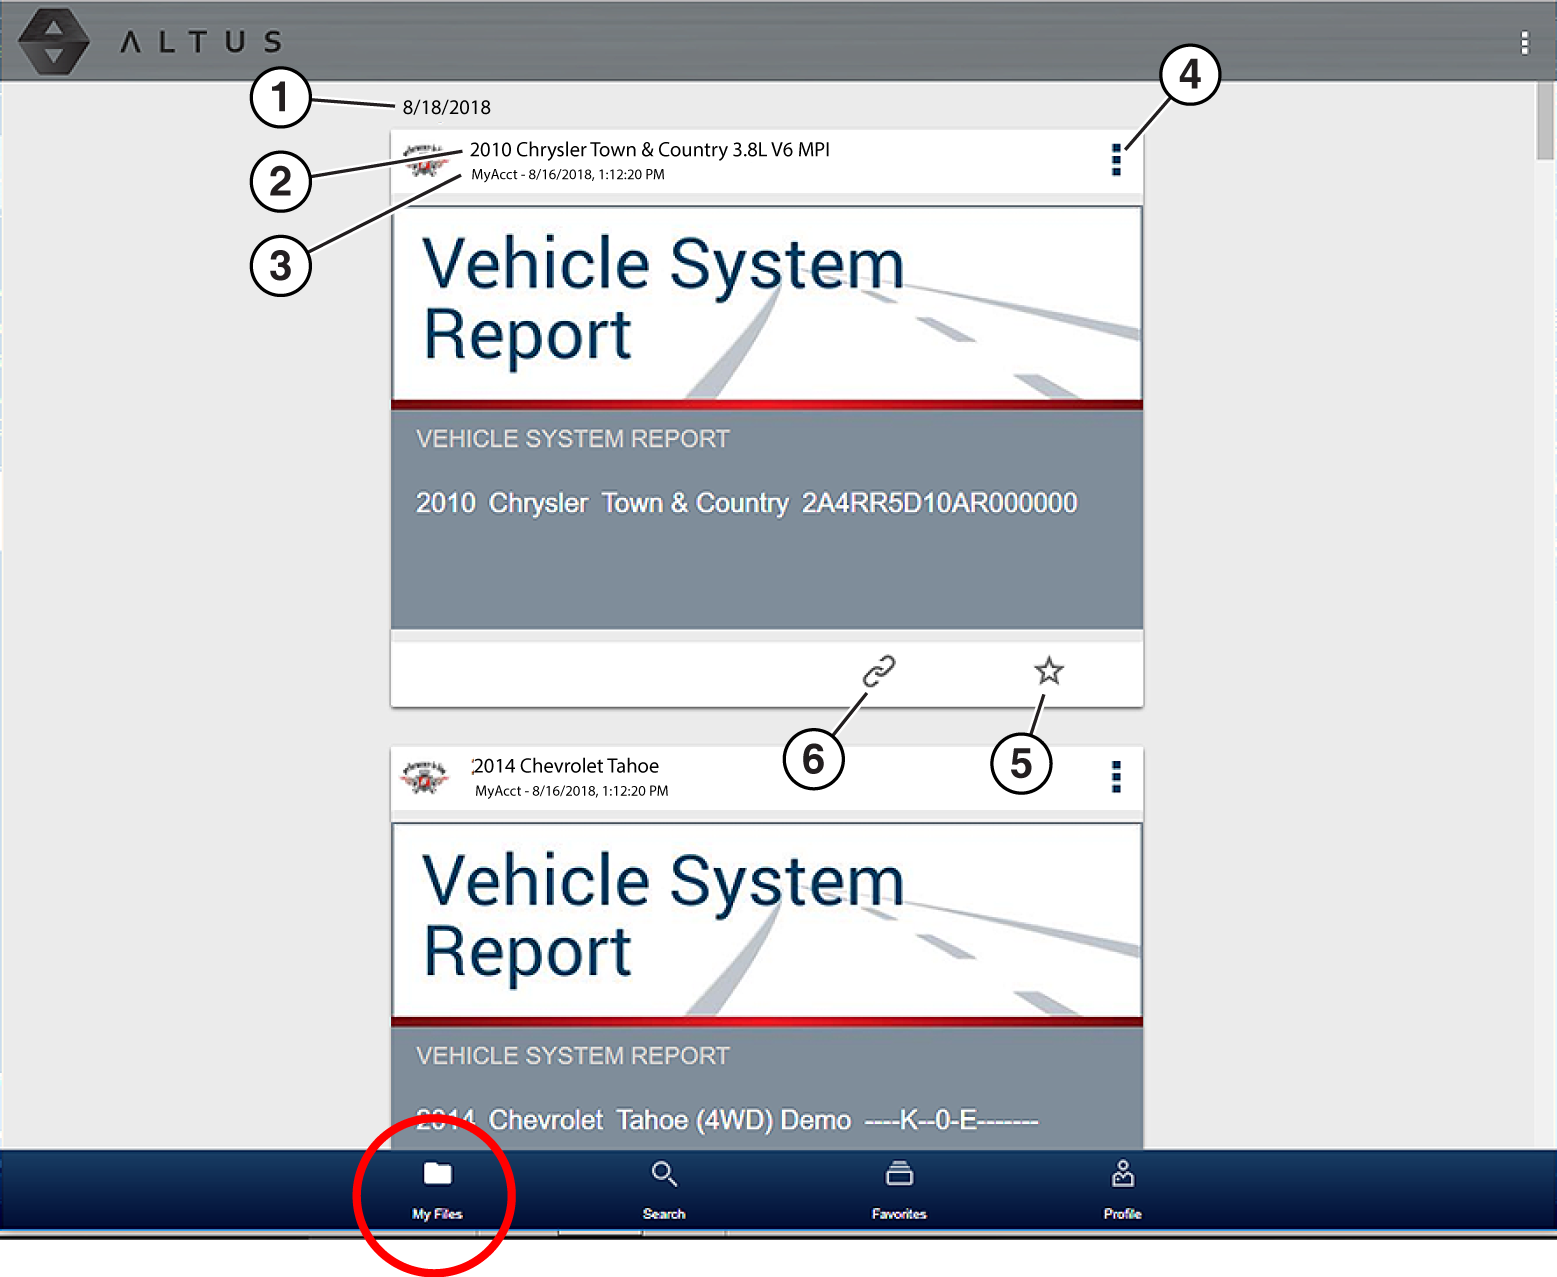
| 1. | Report Upload Date - Reports are displayed with the most recent uploads at the top. The Report upload date is displayed at the upper left. The date is shown once at the top of the series of reports, scroll up / down to see all files within a specific date. |
| 2. | Report File Name |
| 3. | Your Account Username (and timestamp) |
| 4. | Menu Icon - options (Download - Select to download the report to your device), (Delete - Select to delete the report.) |
| 5. | Favorites Icon |
| 6. | Link icon |
Selecting a report opens the report File Details. The File Detail screen allows you to edit report file metadata. See File Detail (Tags) next.
As shown in the image below, selecting (touching) a report from My Files opens the report File Detail card. Selecting the report again opens that report in a new browser tab.
Opening the file in a separate browser tab may allow you to use the browser viewer tools to print or download the file. This feature may not be available in all browsers.
The following describes File Detail card features.
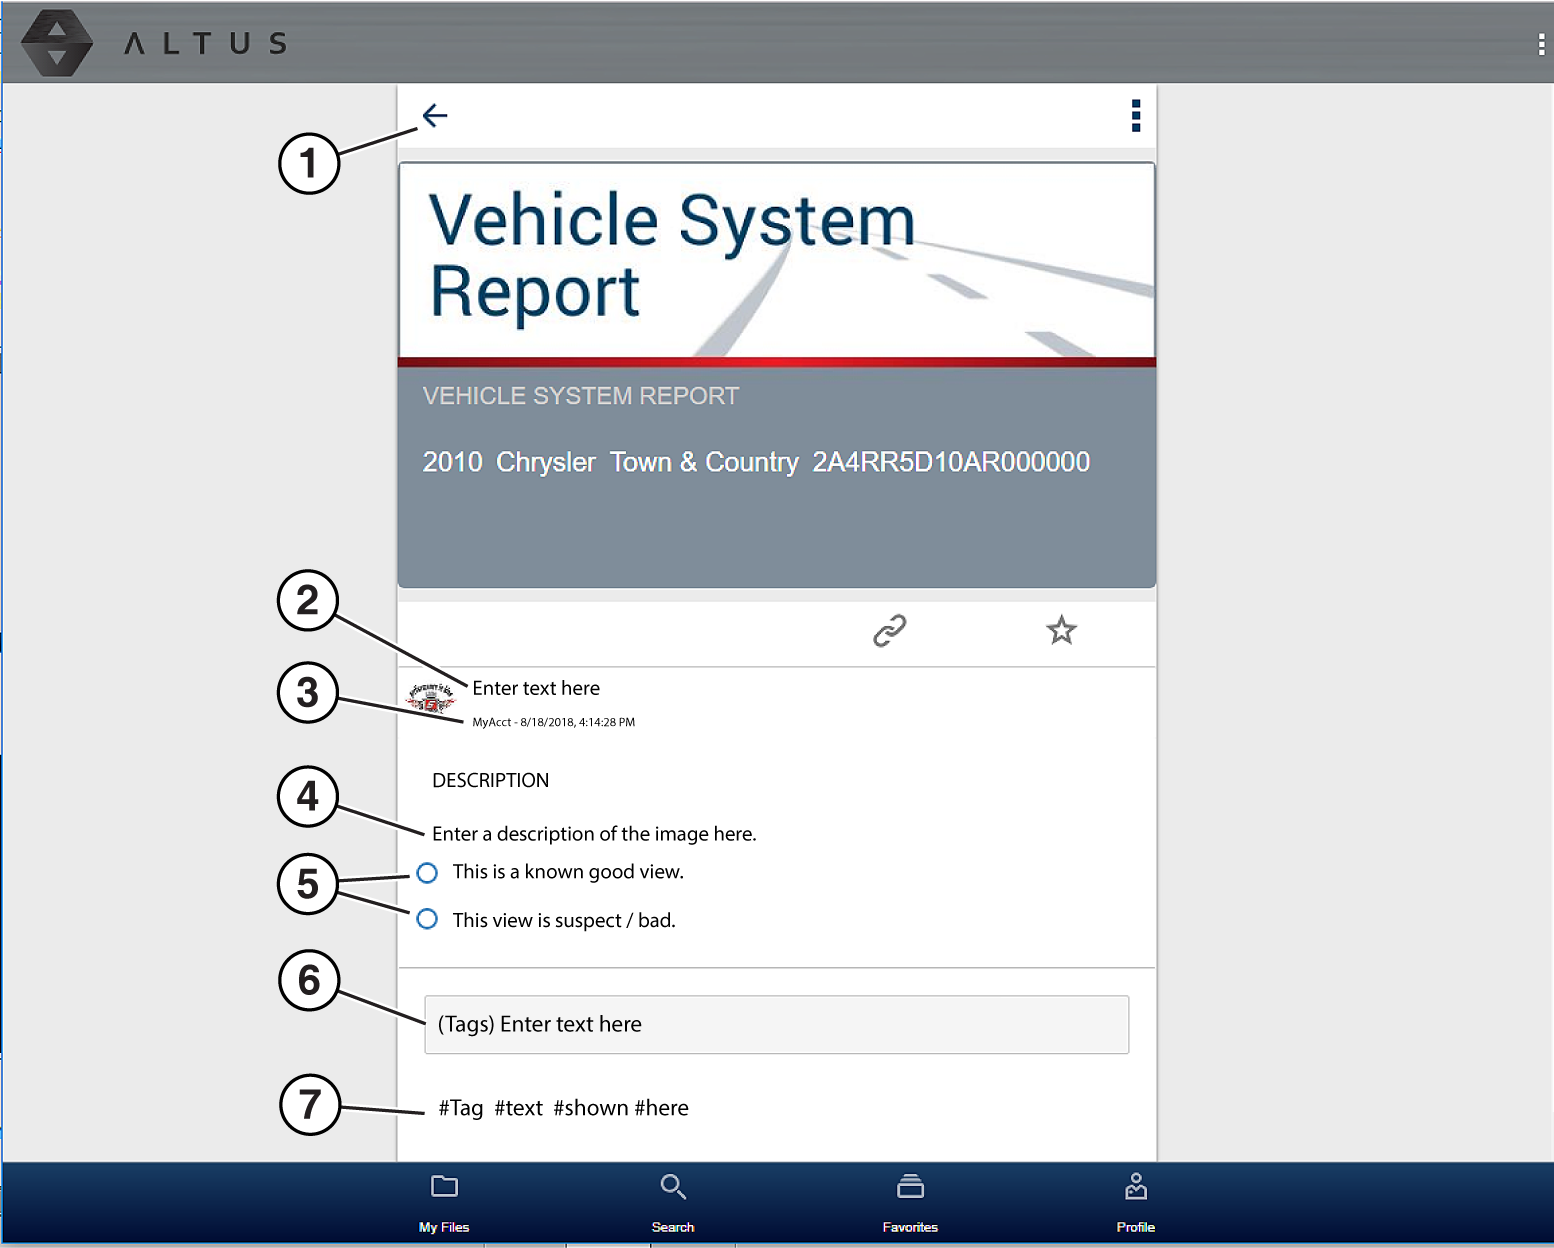
| 1. | Back Icon - Returns to My Files |
| 2. | Report Name (user entered searchable text) - Select the report file name to open the editor. Enter text (alphanumeric) in the field as desired. |
| 3. | Your Account Username (and timestamp) - The timestamp indicates the date/time the file posted. |
| 4. | Description (user entered searchable text) - Enter text (alphanumeric) in the description field as desired. |
| 5. | Known Good / Bad Checkboxes (user defined and searchable) - Selecting a checkbox automatically creates a tag (e.g. #good) and is displayed in the Active Tag(s) field. |
| 6. | Tag (user entered searchable text) - Enter text (alphanumeric) in this field as desired. Tagging a report allows you to associate (tag) descriptive text to a report. Tagging can be used to associate multiple reports with a common tag. The tag text then can be used when performing a search to find all reports with the same tag. Each text entry (word) that is separated by a space (return) is added as a tag, and is displayed in the Active Tag field. |
| 7. | Active Tag(s) - Displays the active tag(s). Tags can include the “good” or “bad” entry from the Known Good / Bad checkboxes, and text entered in the report Name, Description and Tag fields. Each entry is automatically preceded with the “#” symbol. |
Sharing reports from My Files allows you to share a report(s) with others via e-mail, text, social media, etc. My File links are intended as temporary links, and are useful when sharing a report(s) with another Snap-on Cloud user, technician, or shop. If you delete the report from My Files, the shared link will be broken.
The file details displayed in a shared link will be different depending if the message recipient is logged in or not. If the recipient is not logged in, only limited details are displayed.
The URL link that is sent only displays:
| ● | The Report |
| ● | Report Name |
| ● | Your User Name |
| ● | Date Report was posted |
| ● | Report Description |
Sharing / E-mail an Individual Report (Link icon)
To share a report:
| 1. | Select the Link icon on the report card. on the report card. |
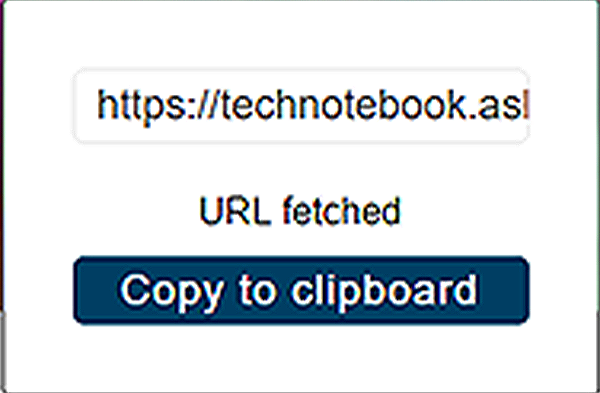
| 2. | Select Copy to Clipboard from the pop-up window. |
| 3. | Open your (e-mail, text, social media, etc.) app and paste the URL into a message to share with others. |
Sharing all Reports (Share My Gallery)
To share your entire gallery (all files in My Files):
| 1. | Select the Menu icon from the upper toolbar. |

| 2. | Select Share My Gallery. |
| 3. | Select Copy to Clipboard from the pop-up window. |

| 4. | Open your (e-mail, text, social media, etc) app and paste the URL into a message to share with others. |
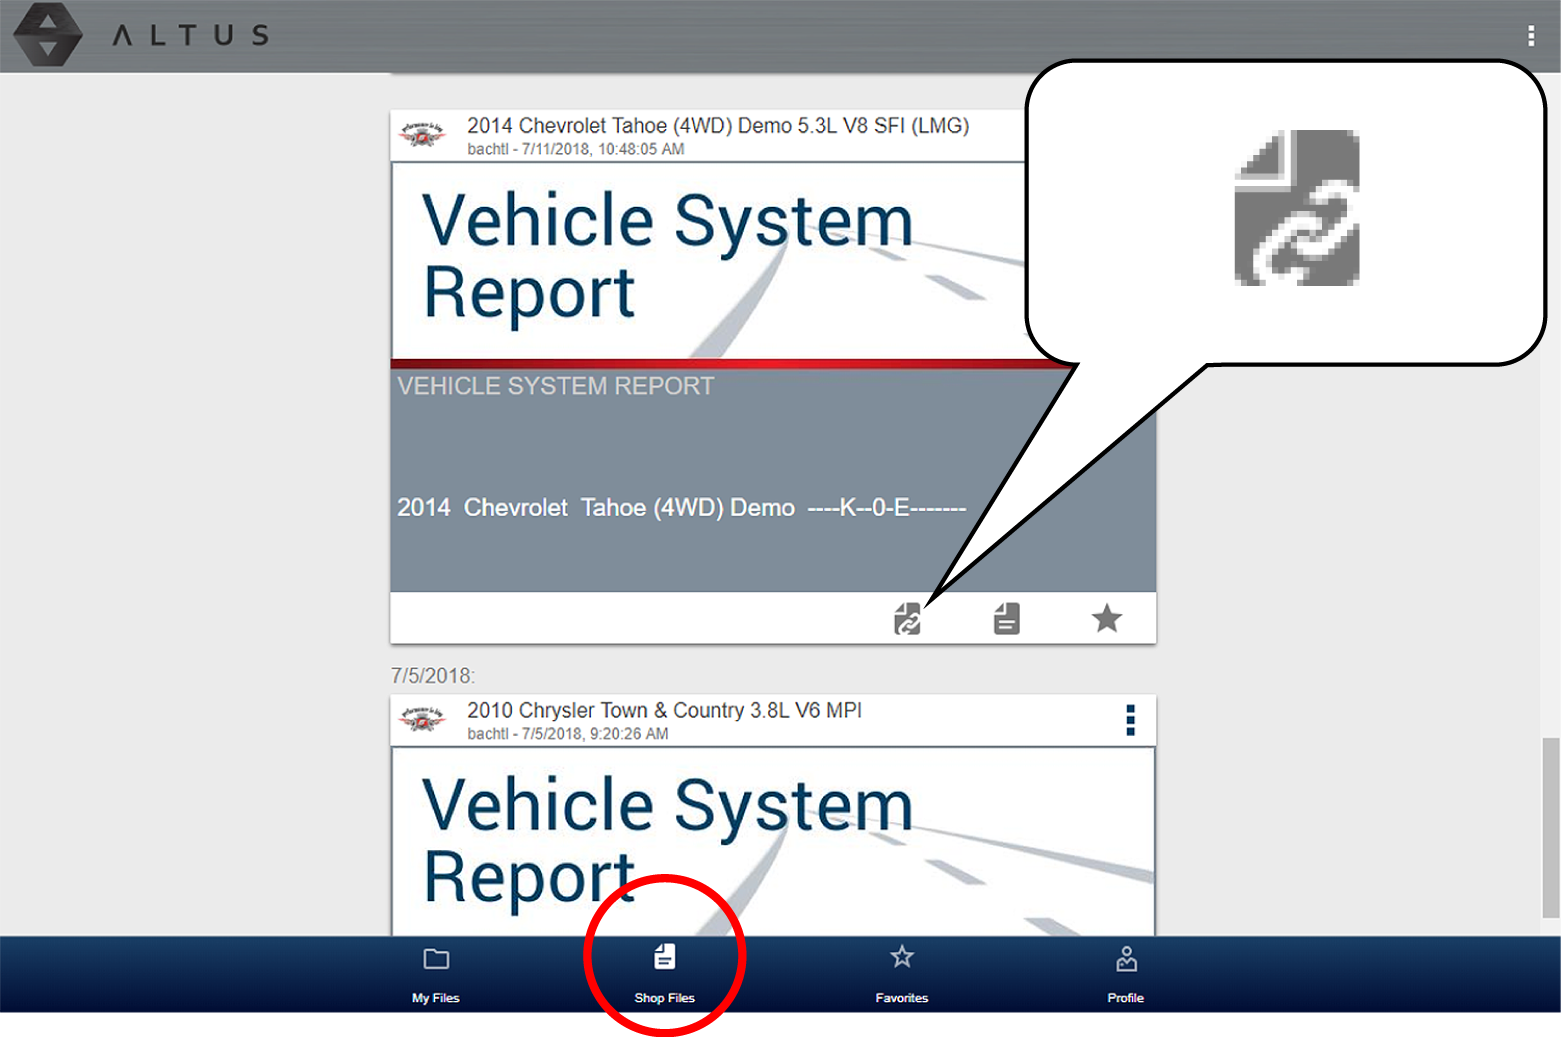
Shop Files allows you to share a report(s) with others via e-mail, text, social media, etc, from a permanent location in the cloud. Unlike sharing a report(s) from My Files, the link is permanent and will work, even if the original file is deleted.
Shop Files links are useful when sharing a report with a customer that is not a registered user that just needs to see the report, and that may need access to the report in the future.
The file details displayed in a shared link will be different depending if the message recipient is logged in or not. If the recipient is not logged in, only limited details are displayed.
To add a report(s) to Shop Files:
From My Files, select the Copy icon on the report card to copy the report to Shop Files. This copies the report to a permanent location in the cloud.
To share an individual Shop File Report:
| 1. | From Shop Files, select the Copy icon on the report card. |
| 2. | Select an option from the pop-up window. |
Some selections may be grayed out or not shown, indicating the option is not supported on your device/system.

| ● | Copy to Clipboard - open your (e-mail, text, social media, etc.) application and paste the URL into a message to share with others. |
| ● | Send via Email - your system default e-mail application will open a new message with the link attached, ready to be sent. |
| ● | Send via SMS (Short Message Service) - this option is used with supporting mobile devices, and will typically open a new text message with the link attached, ready to be sent. |
To share all files in Shop Files:
| 1. | From Shop Files, select the Menu icon from the upper toolbar. |

| 2. | Select Share My Shop Files. |
| 3. | Select Copy to Clipboard from the pop-up window. |

| 4. | Open your (e-mail, text, social media, etc) application and paste the URL into a message to share with others. |
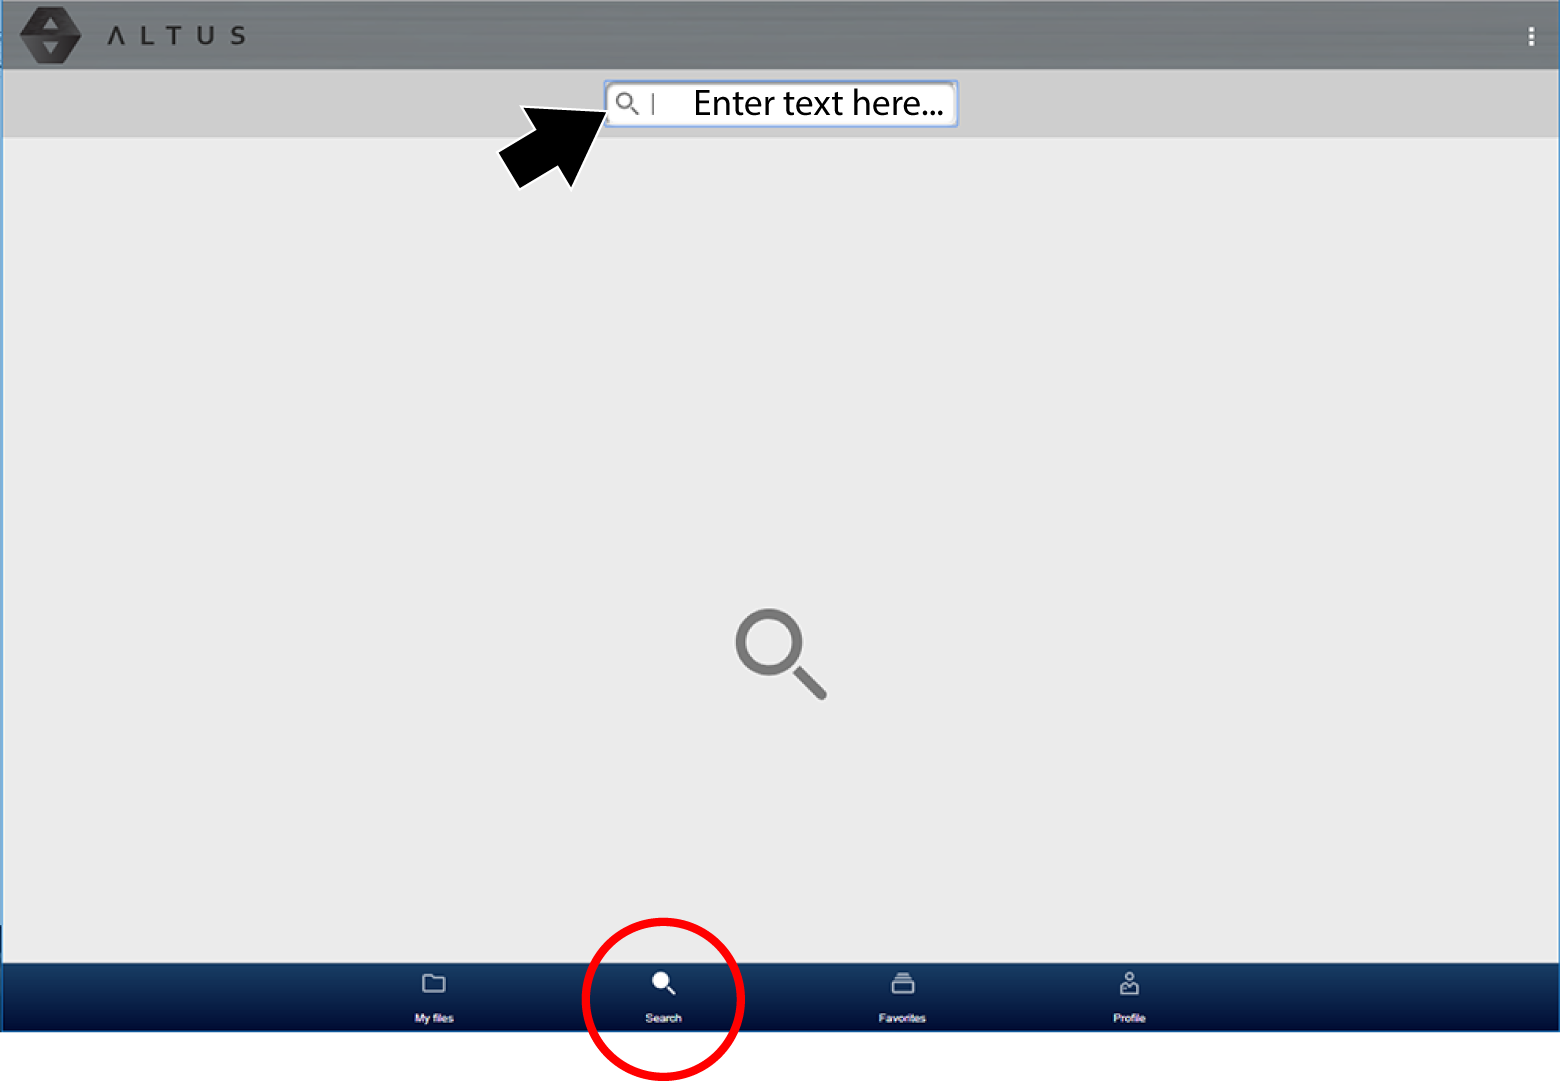
The Search screen allows you to perform text searches on all uploaded files and view the results.
To search for a specific file or set of files, enter a search term in the search box and select the magnifying glass icon (or press Enter).
Search queries the following to find results:
| ● | Report File Name- name can be either system assigned or user assigned |
| ● | Known Good / Bad Checkboxes- selecting a checkbox automatically creates a searchable tag (e.g. good or bad) |
| ● | Description - user entered text |
| ● | Tag - user entered text |
See File Detail (Tags) (in this section) for additional information on the above “user entered” text.
If the VIN and license plate number were saved during vehicle ID, they can be used as search criteria.
The Favorites screen displays all the reports selected as favorites.

To set a file as a ”Favorite”, select the Favorite icon (star symbol) to highlight the icon.
|
Description |
Icon |
|
Favorite (on) |
|
|
Favorite (off) |
|


The Favorites icon can be selected/deselected at anytime when displaying files.
Notes:
| – | If you need your shop contact information displayed on the report, you must use ShopStream Connect™ to setup the report with this information and print it. |
| – | Navigation and menu options will vary by device and/or operating system (PC, mobile, etc). |
| – | To view and/or print the Vehicle System Report using the Snap-on Cloud, a PDF file type viewer is needed. |
| – | To upload data to the Snap-on Cloud, the tool must be connected to Wi-Fi, and you need to have an authorized account. |
Using a PC - Typical
| 1. | Login to your account at ALTUSDRIVE.com. |
| 2. | Find the Vehicle System Report to print, and then select the menu icon on the card (upper right). |
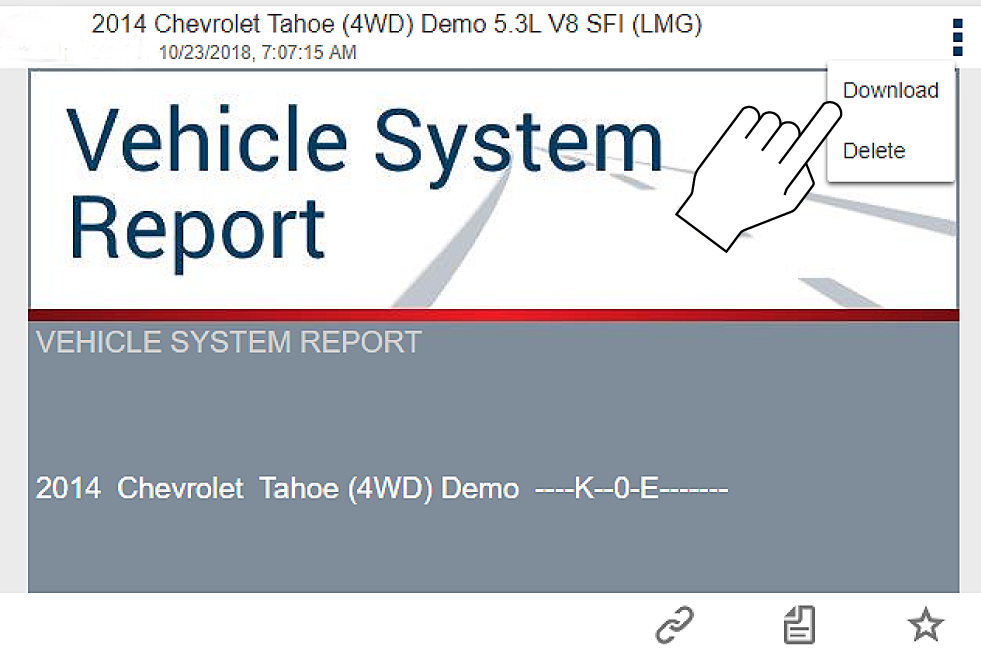
| 3. | Select Download. |
| 4. | Once downloaded, you can print or share the report from your device. |
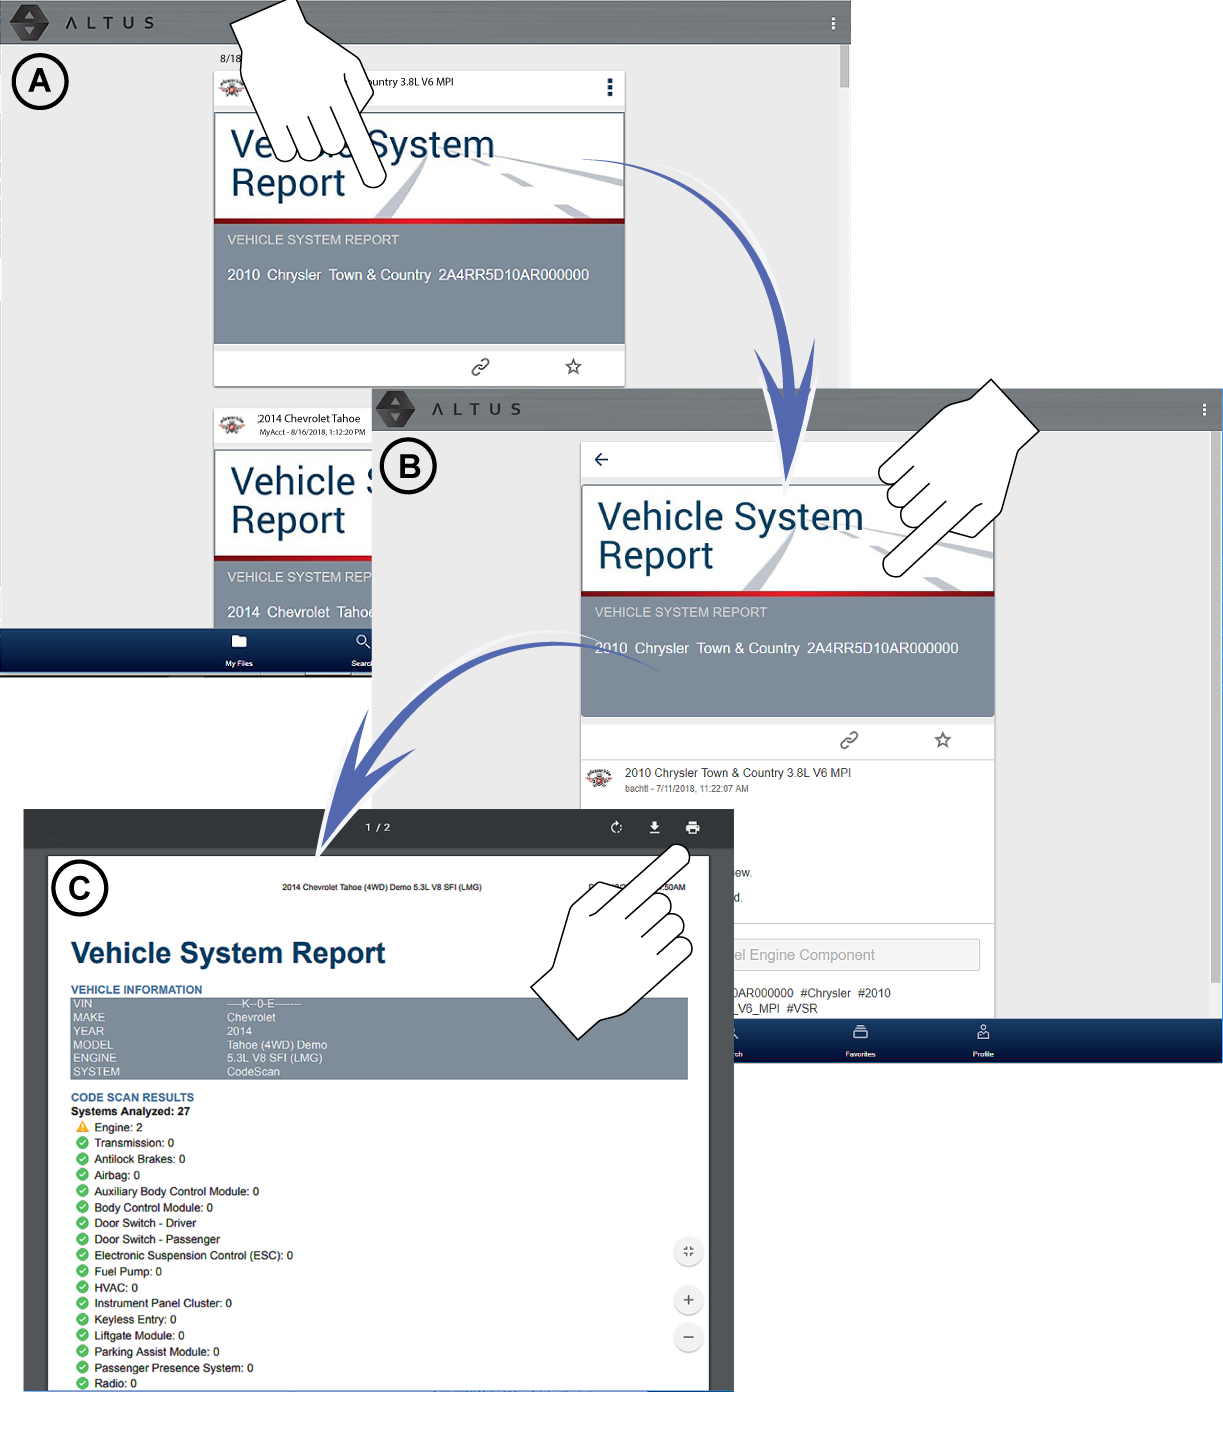
Using a Mobile Device - Typical
| 1. | Login to your account at ALTUSDRIVE.com. |
| 2. | Find the Vehicle System Report to print, and tap it (Figure - A) to open the report detail card. |
| 3. | Tap the report again (Figure - B). This may either start an automatic download or open the report in a new browser tab (Figure- C). If needed, tap and hold the report (Figure - D) to display the options menu and select the applicable option to download the file. |
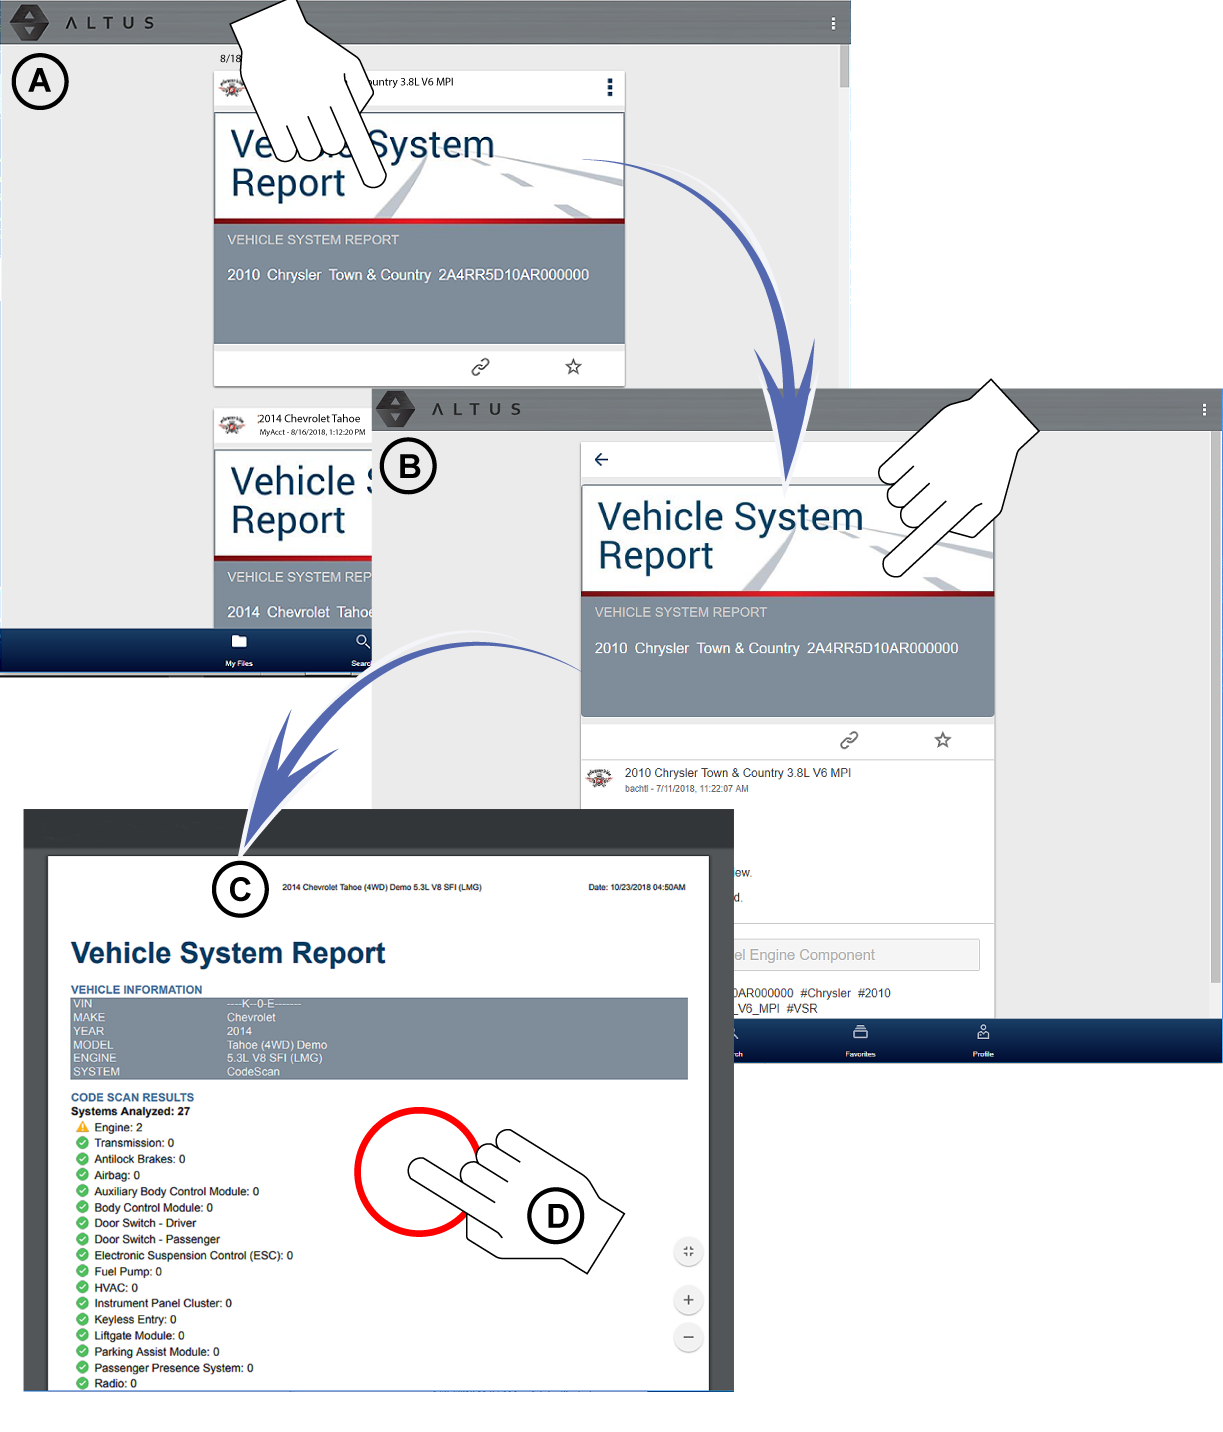
| 4. | Once downloaded to your device, use an application to print the report. |
If you do not have print capabilities on your device, you may be able to download or transfer/share the file to another device with print capabilities. Refer to the “User Guide” of your device for printer setup information.
To upload data to the Snap-on Cloud, the tool must be connected to Wi-Fi, and you need to have an authorized account.
Code Scan is not supported on all vehicles.
Home Screen: Scanner > (Identify Vehicle) > Code Scan (System Menu)
| 1. | From your diagnostic tool, once you have connected and identified a vehicle through Scanner, select Code Scan from the System menu. |
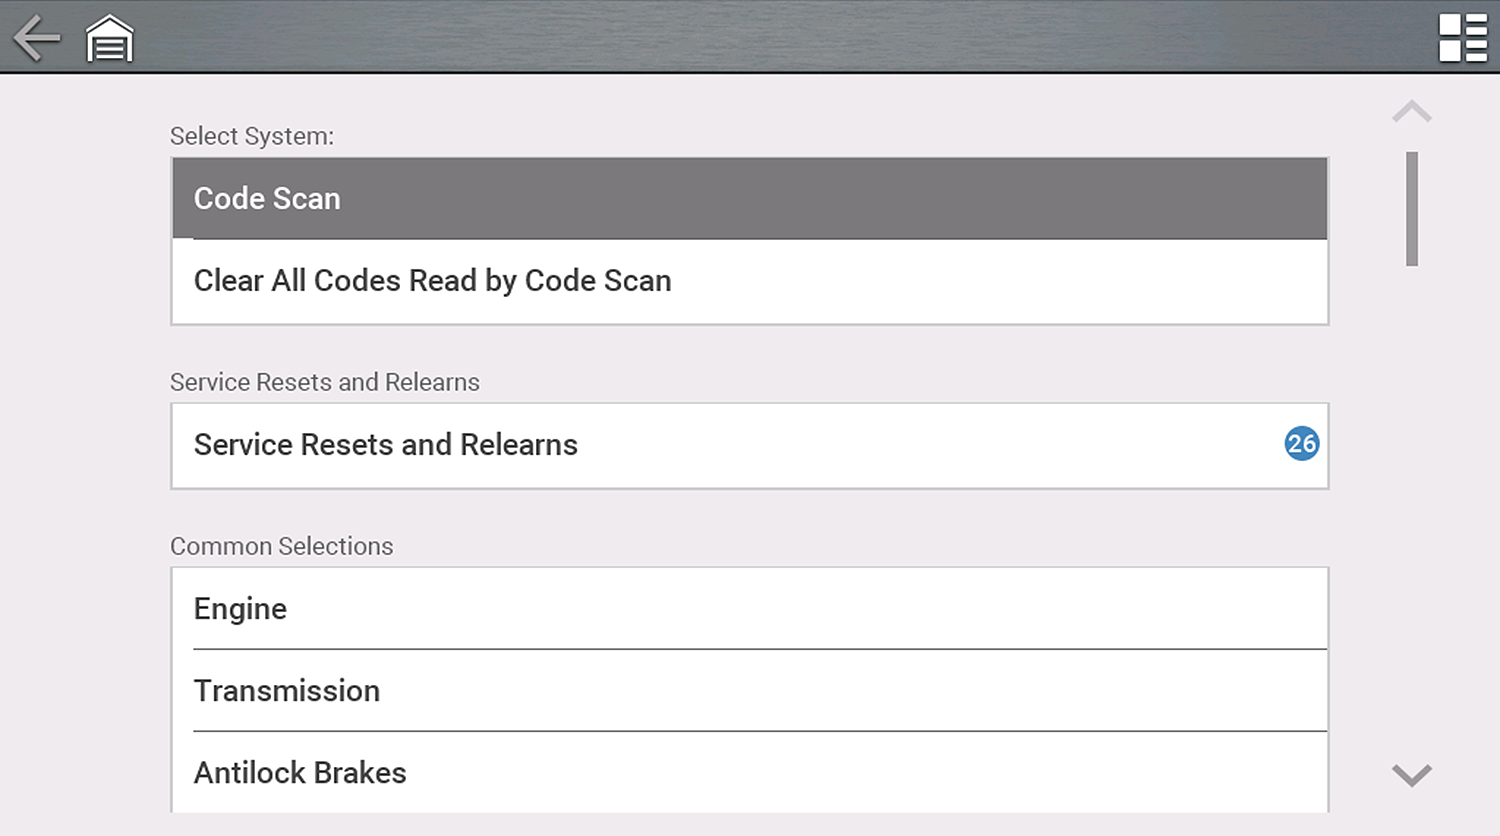
| 2. | Choose which type of Code Scan, Pre or Post Scan. |
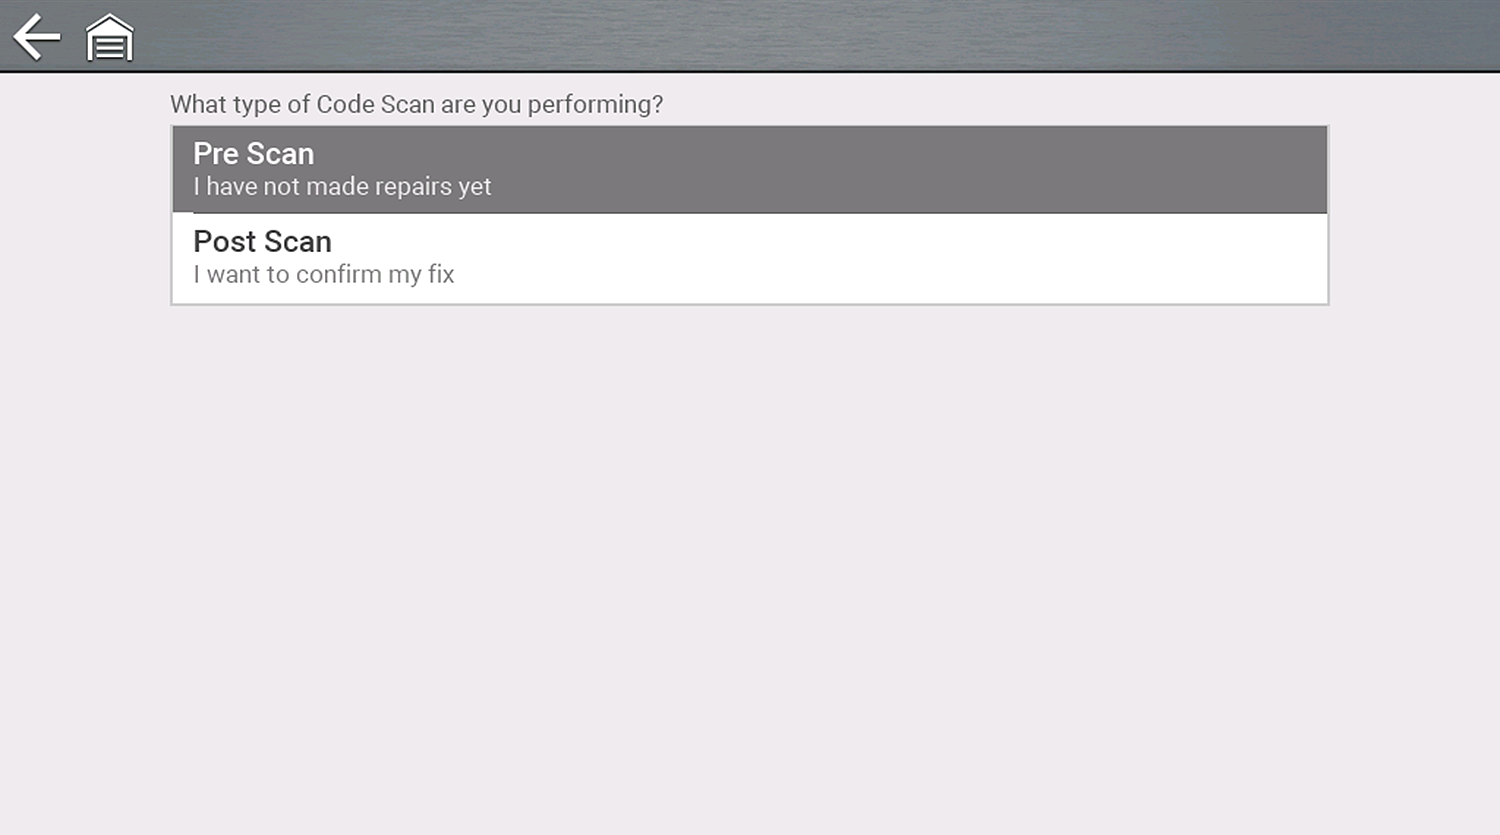
Code Scan runs an active scan of vehicle control modules, and then displays the results.
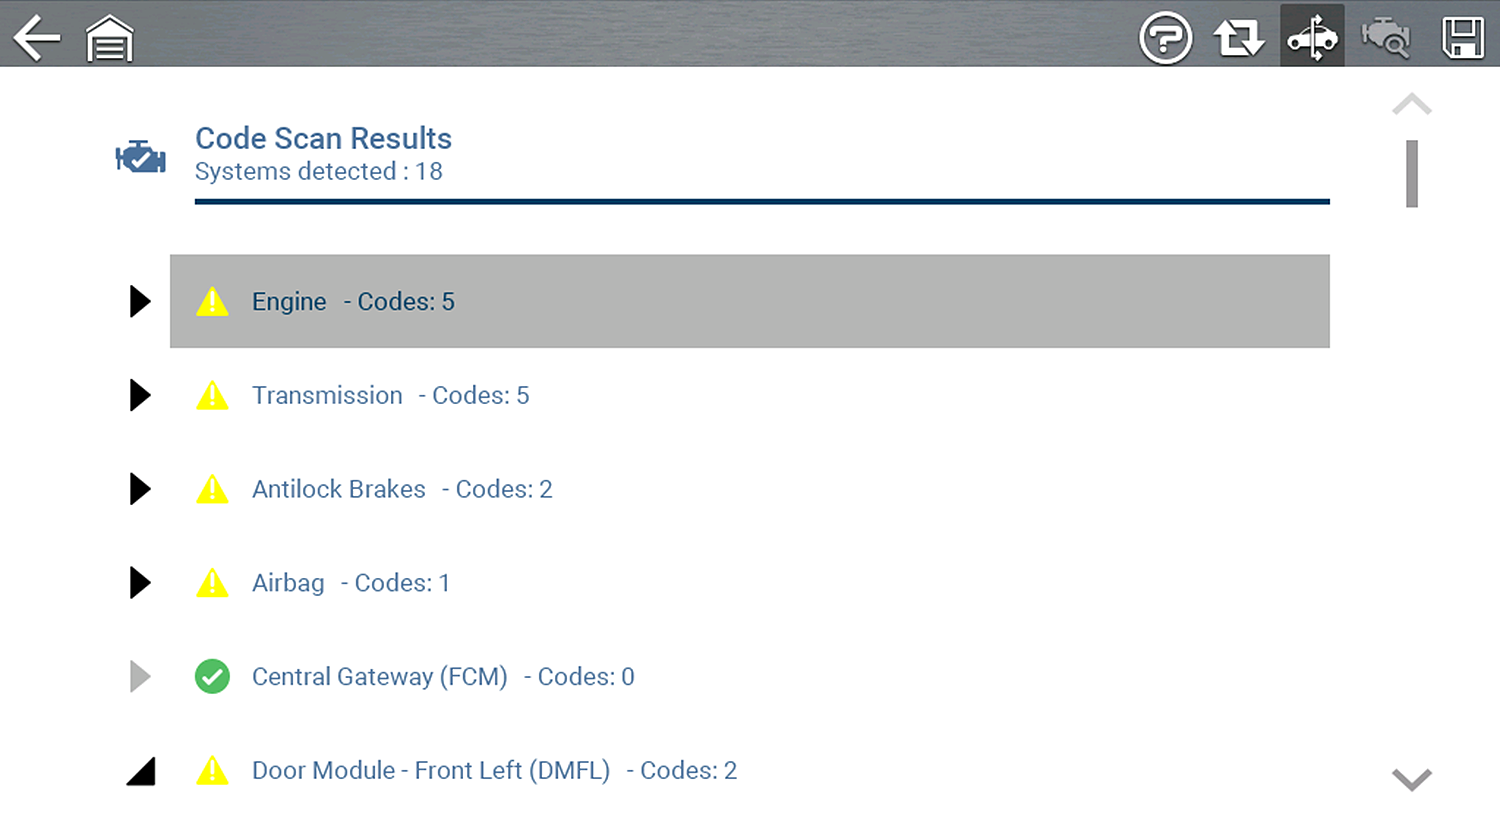
After scanning is complete, the report is automatically saved and uploaded to the Snap-on Cloud, see My Files in this section.