Scanner - Motorcycle
This section describes basic Scanner functions including data cable connection, and how to display diagnostic trouble codes for motorcycle applications.
Many of the Scanner functions are similar or identical in operation as the Automotive Scanner, see that section for additional information not included here.
The Scanner function allows your diagnostic tool to communicate with the control modules of the motorcycle being serviced. This allows you to perform tests, view diagnostic trouble codes (DTCs), and live data parameters from various vehicle systems such as the engine, antilock brakes (ABS), body control module and more.
Data Cable Connection
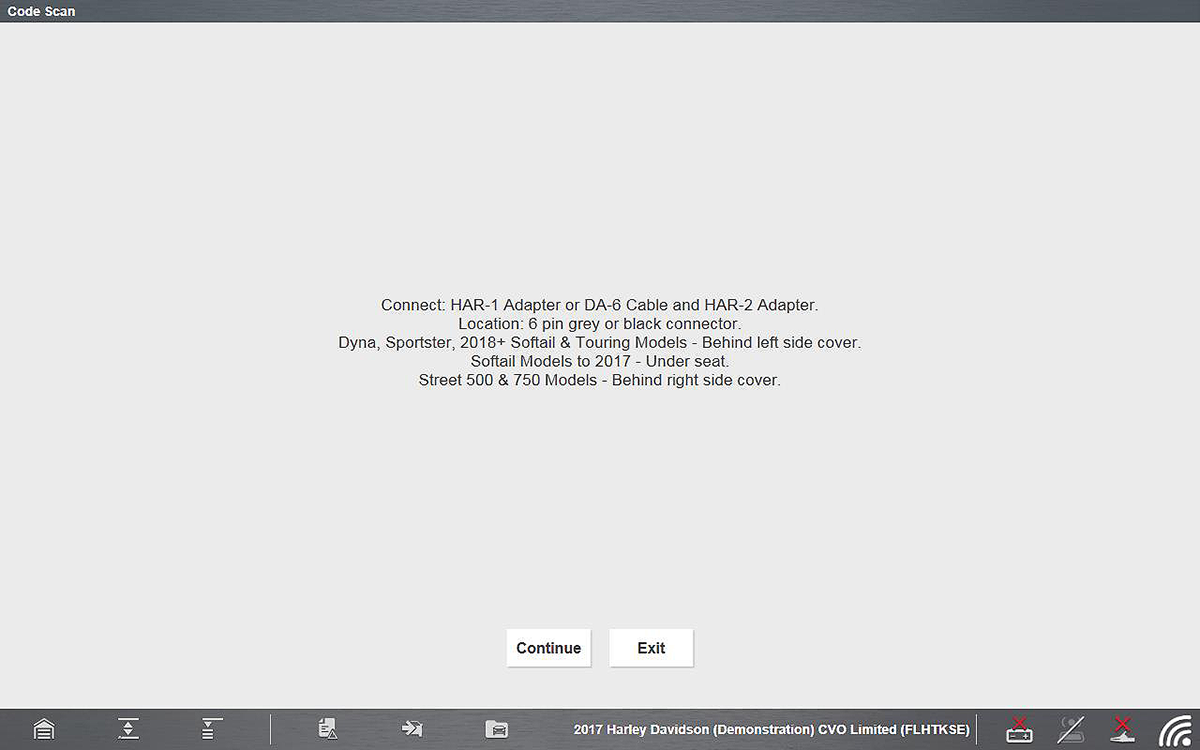
On-screen data cable connection instructions are provided.
The illustrations below shows the typical data cable connection using the DA-6 data cable adapter connected to the CSM.
The ISO-1 SVI cable adapter (ISO 19689 / Euro5) must be used with diagnostic software version 22.2 or later.
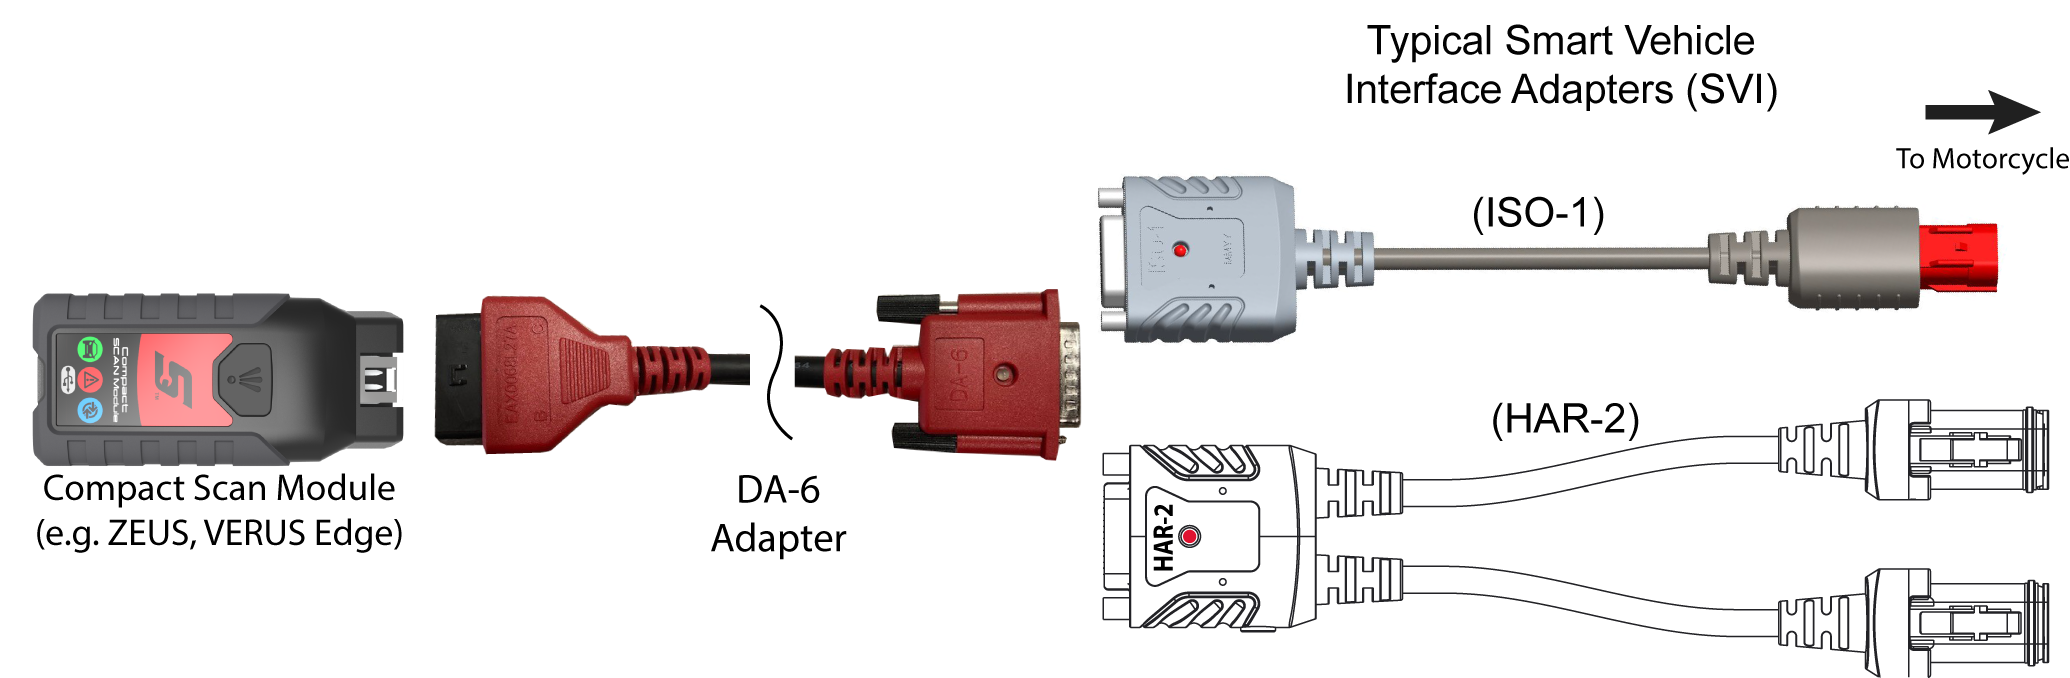
| 1. | Follow the onscreen instructions to connect the applicable Smart Vehicle Interface (SVI) to the motorcycle diagnostic connector. |
The SVI requires 12VDC power to communicate. Power is normally supplied through the motorcycle diagnostic connector, however the supplied 12VDC power accessory cable (not shown) can be used when power is needed. When the LED is on, the SVI is being powered.
| 2. | Connect the applicable data cable/adapter to the SVI and |
Ensure the LEDs on the SVI and data cables are on when establishing communication between the motorcycle and diagnostic tool.
Contact your sales representative to purchase additional Smart Vehicle Adapters (SVIs) for other Motorcycle manufacturers.
Starting Scanner (Overview)
The Scanner icon  is located on the Home screen.
Menus, options and procedures will vary across motorcycle manufacturers and models.
| 1. | Select Scanner from the Home screen. |
| 2. | Select Motorcycle from the automotive Vehicle Make list. |
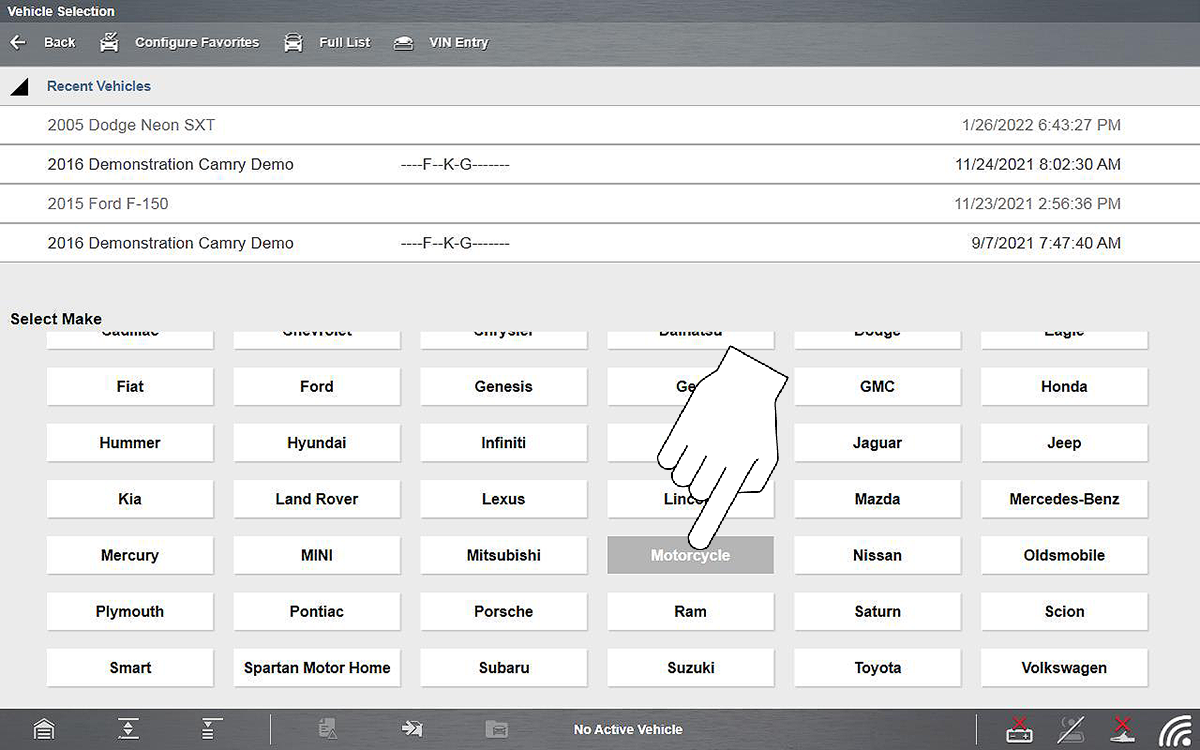
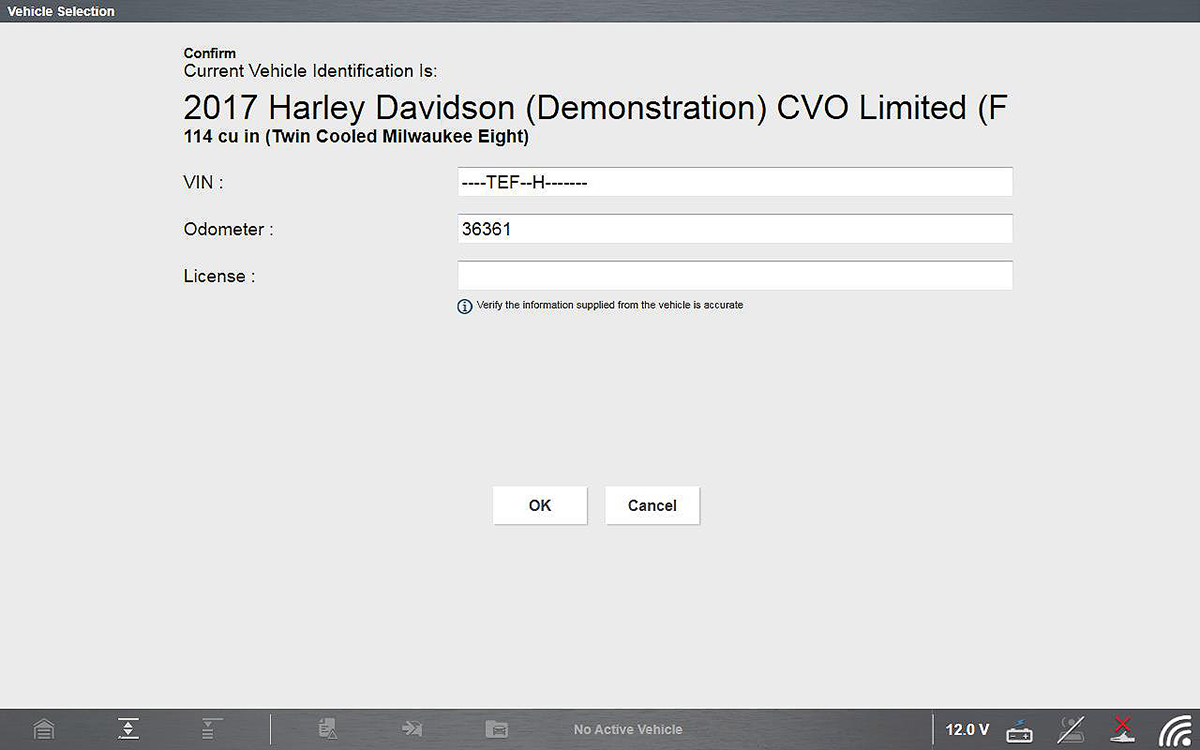
| 3. | Follow the prompts to identify the motorcycle (e.g. make, year, model), then select OK to confirm. |
Depending on the motorcycle, the identification process may require manual entry of the motorcycle information, or it may be automated.
| 4. | Follow the onscreen instructions to connect the data cable and Smart Vehicle Interface (SVI) to the motorcycle diagnostic connector. |
| 5. | Turn the ignition on and move the “run” switch to on, or start the engine. |
Ensure the LEDs on the SVI and data cables are on when establishing communication between the motorcycle and diagnostic tool.
| 6. | Follow the prompts to select a System (e.g. Engine, ABS, Radio). |
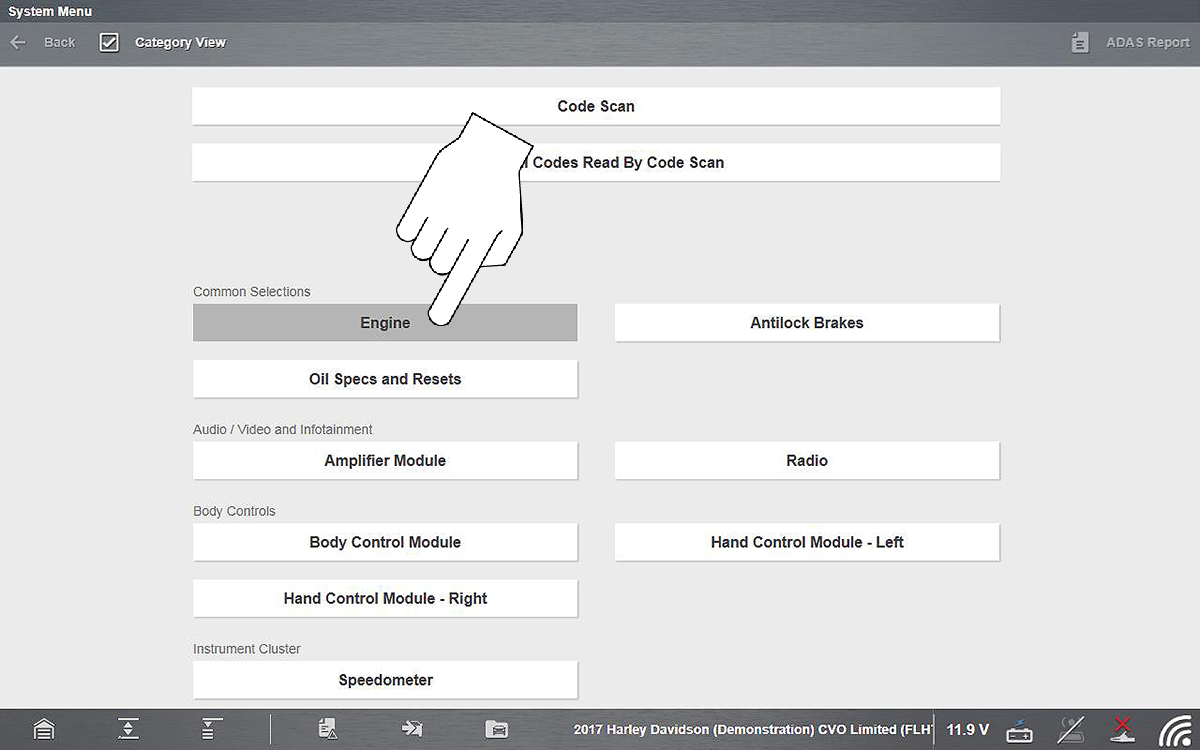
| 7. | Select a Function/Test (e.g. Codes Menu, Code Scan, Data Display, Functional Tests). |
Damage to electronic control modules may occur if communication is disrupted. Make sure the CSM and SVI are properly connected at all times during testing. Exit all tests before disconnecting the CSM and SVI, and before powering down the diagnostic tool.
The Scanner function remains open as long as there is an active communication link with the motorcycle. You must interrupt this communication link in order to exit from tests and power down the diagnostic tool. A warning message displays if you attempt to shut down while the diagnostic tool is communicating with the motorcycle.
Vehicle Identification
The motorcycle must be correctly identified for the diagnostic tool to communicate, and display data correctly. Menus and navigation will vary by make and model.
Depending on the motorcycle, the identification process may require manual entry of the motorcycle information, or it may be automated. The following Scanner functions are available to identify the motorcycle:
Auto ID - Automatically completes the identification process after the motorcycle make and year are manually entered.
Manual ID - Allows for manual entry of all required motorcycle identification criteria.
The following procedure applies to most motorcycles, and may vary depending on the motorcycle. Not all motorcycles support the Auto ID feature.
| 1. | Select Scanner  from the Home screen. from the Home screen. |
| 2. | Follow the prompts to identify the motorcycle (e.g. make, year, model). |
A menu option may be displayed to choose either Automatic ID or Manual ID.
| ● | Selecting Automatic ID (If supported) will briefly display a communications screen informing you that the diagnostic tool is attempting to establish communication and determine vehicle identification. Once the vehicle has been identified, the vehicle confirmation screen displays. If the vehicle information is correct, select OK to continue. If the vehicle does not support Auto ID, the diagnostic tool will attempt to identify the vehicle and then display a message indicating that vehicle identification cannot be made. If this occurs, proceed to “Selecting Manual ID” next. |
| ● | Selecting Manual ID allows you to manually enter all the vehicle information to identify the vehicle. Follow the screen prompts to enter all the information required to identify the vehicle. Once the vehicle has been identified, the vehicle confirmation screen displays. If the vehicle information is correct, select OK to continue. |
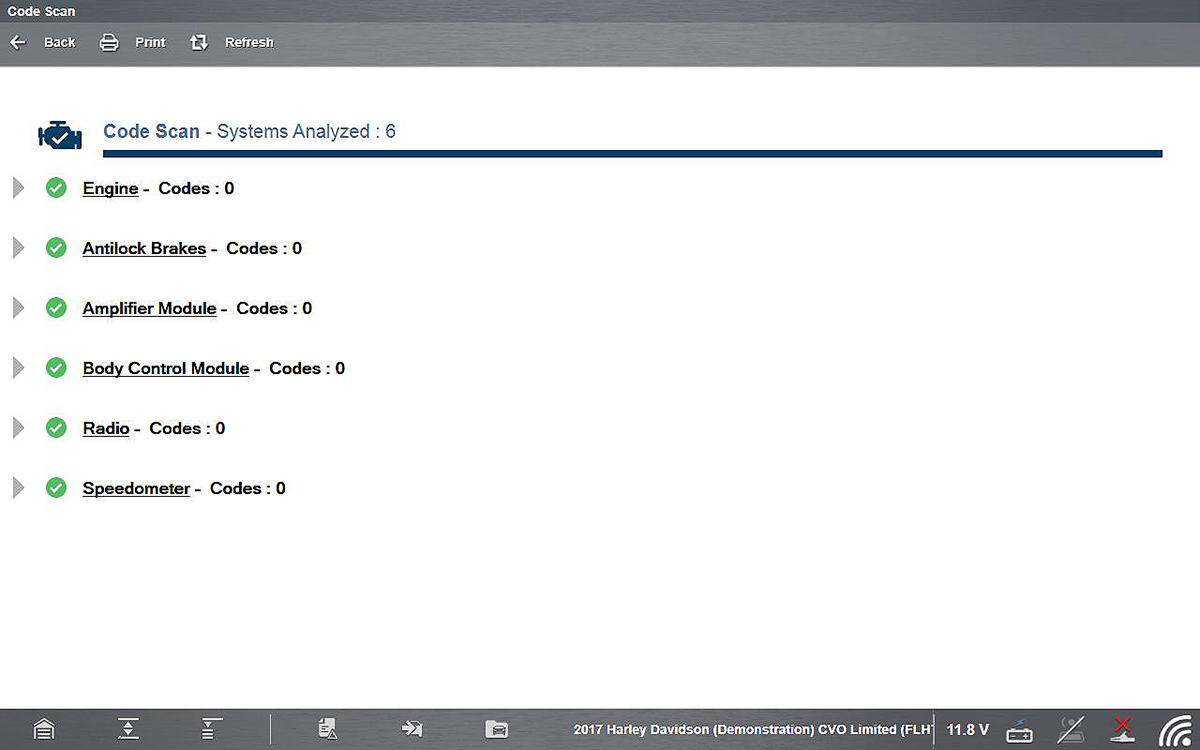
Code Scan
Code Scan is available from the Main System Menu, and when selected it scans the control modules for codes. The results of the scan are configured into a report that is accessible and printable using Snap-on Cloud, for additional information see Code Scan / Vehicle System Report.
PRE / POST Scan Importance - As many systems do not turn on the check engine light or other indicator, performing a code scan before making any repairs may help in troubleshooting, by identifying possible unknown issues that may be related to the present symptoms.
Performing pre and post scans also allows you to record in report format the pre-condition of the vehicle and compare the post scan after work is complete to confirm the repairs were completed properly.
The Code Scan function and results are dependent upon the vehicle. Not all vehicles may support this function.
Selecting Code Scan from the Vehicle System menu starts an active scan of vehicle control modules, and opens the Code Scan results screen.
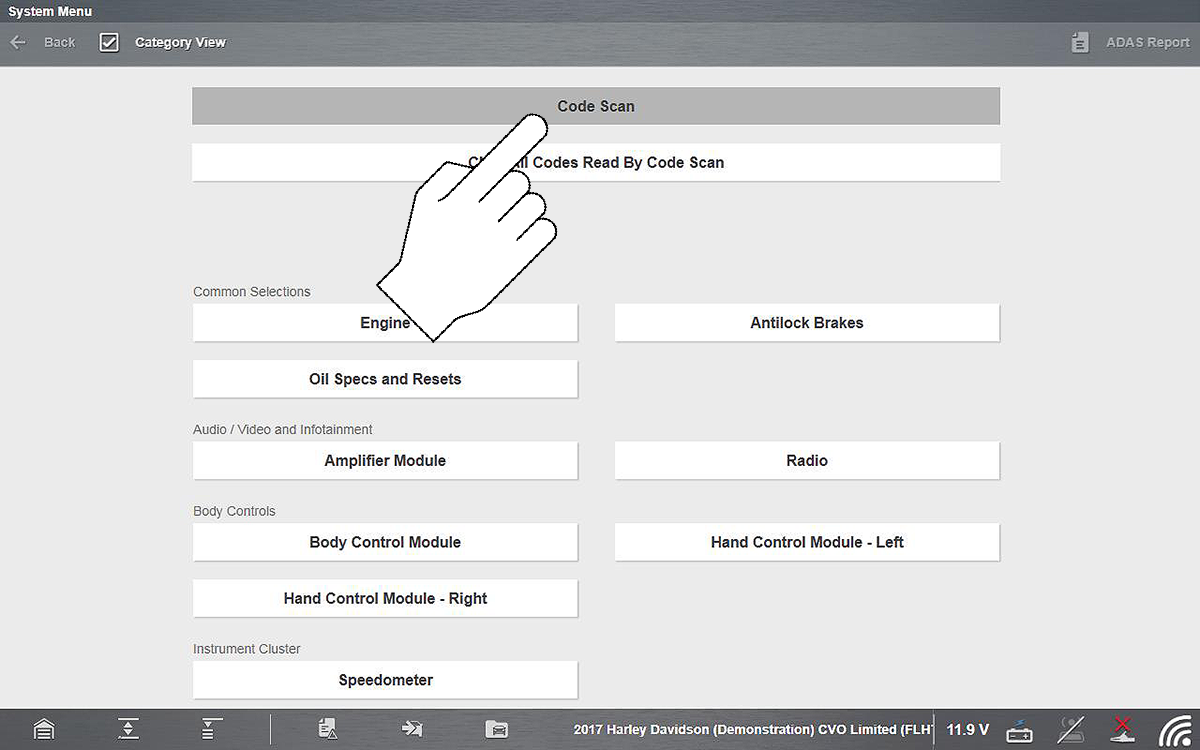
When initially started, progress status is shown at the top indicating the active scanning progress. Once completed, code results are displayed by system.