Software Upgrade/Activation Instructions
Application - VERUS Edge and ZEUS family of tools.
Use the following instructions to upgrade or activate diagnostic tool software. This will upgrade the diagnostic software on a customers diagnostic tool (sold unit) from a non-current software version to the current version.
ONLY full price and loyalty upgrades will have the option to "complete the upgrade later" via direct download direct on the diagnostic tool via Wi-Fi.
Step 1 - USB Stick Initialization - Using the USB Setup Utility
Proceed to step 2 (USB Stick Configuration) if you already have an Initialized USB Stick.
USB Stick Initialization is ONLY required once at the beginning of each ScanBay software release.
| – | This process configures the USB stick to be used with the current version of ScanBay. |
| – | A Initialized USB Stick is required before you can upgrade or make any changes to diagnostic software. |
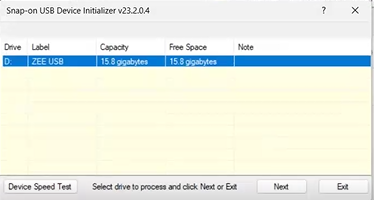
| 1. | Insert a USB Stick into your Chrome sales system laptop. |
| 2. | Open the USB Setup Utility from the desktop icon  . . |
The setup screen displays ALL the connected USB devices. Choose the USB stick you wish to use and click Next.
| 3. | If there are files on your USB stick, you are prompted to move them to another location, if needed follow the prompts to do so. |
| 4. | Once the stick is ready, click Next to "Initialize" the USB stick. |
The volume label will be renamed.
| 5. | At the "completed" confirmation screen, click OK to finish. |
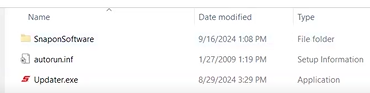
| 6. | This example shows the typical files that are loaded onto the stick. |
Remember the USB stick is now Initialized, so you don't need to initialize it again until the next ScanBay software release.
Step 2 - USB Stick Configuration
This process collects the necessary diagnostic tool information that is required for ScanBay programming.
| 1. | Connect the AC power supply to the diagnostic tool, and power up the diagnostic tool. |
| 2. | IMPORTANT - Once the tool is fully booted up, CLOSE the diagnostic software and EXIT all other open programs. |
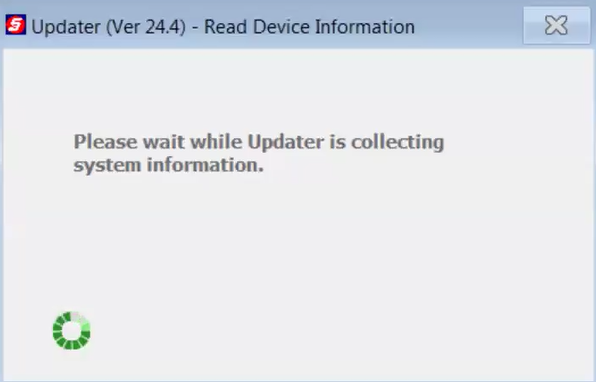
| 3. | Insert the Initialized USB Stick into the diagnostic tool (USB jack is on the side). |
The software will "Auto Run" (automatically scans the files of the diagnostic tool).
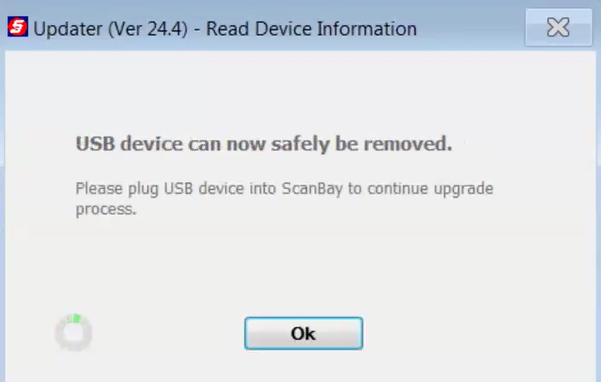
| 4. | When prompted click OK, and remove the USB Stick. Keep the diagnostic tool on with Windows running. |
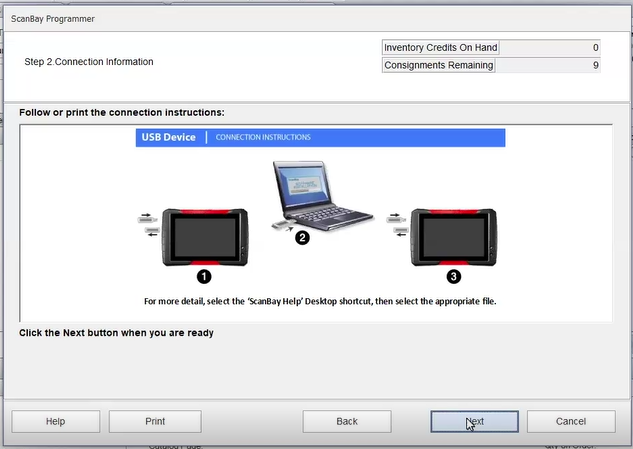
Step 3 - Software Upgrade Programming
| 1. | Insert the Configured USB stick (see USB Stick Configuration above) into your Chrome PC sales system laptop. |
| 2. | On the Chrome sales system, select the Customers Record. |
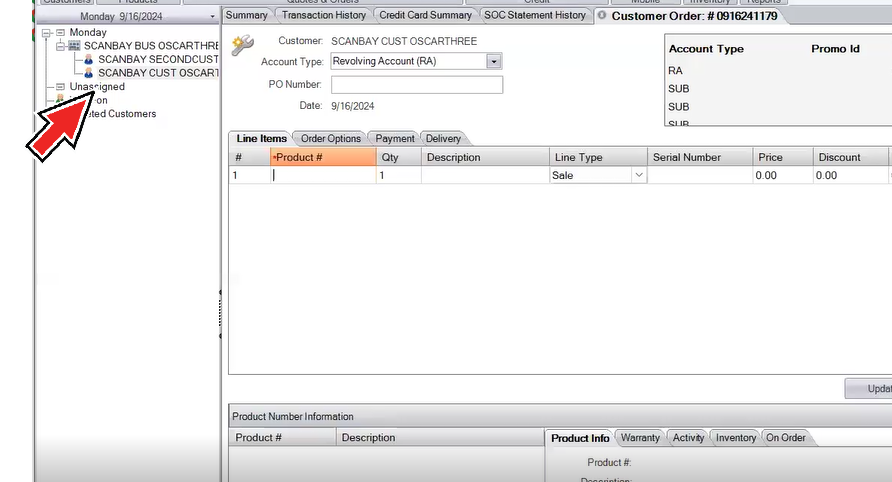
| 3. | Click the Order button on the upper toolbar, to start an order, or select the order from the tabs, if you already opened it. |
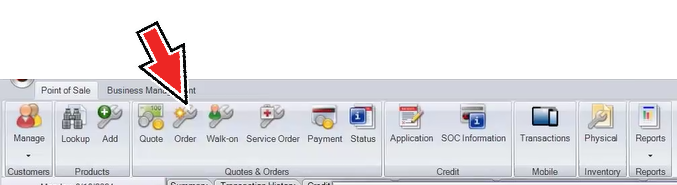
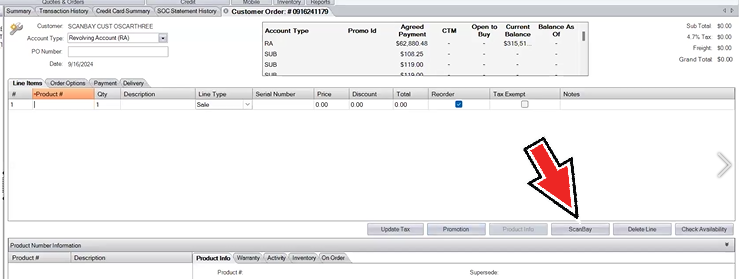
| 4. | Start ScanBay (click the button). |
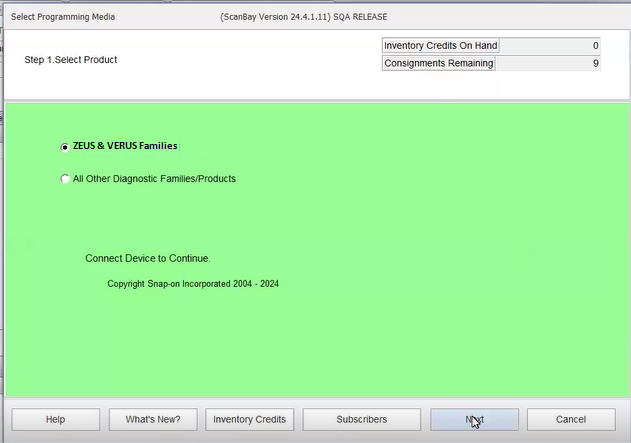
| 5. | Select "ZEUS and VERUS Families" at the prompt, then Next. |
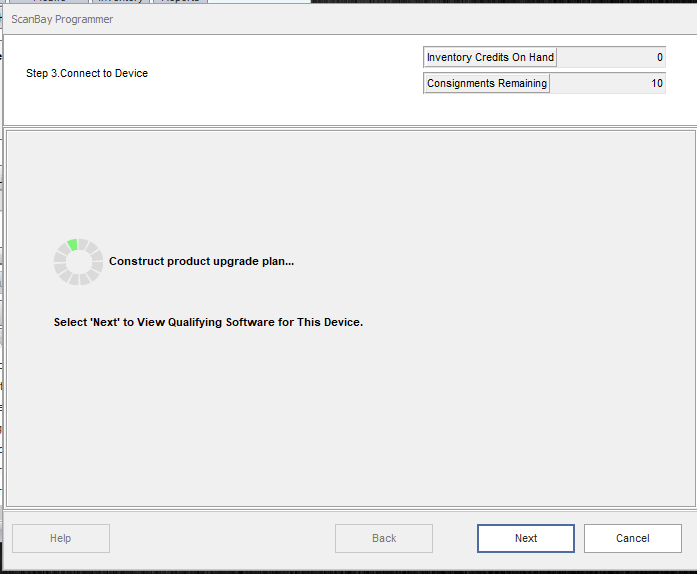
Select Next to view qualifying software for device.
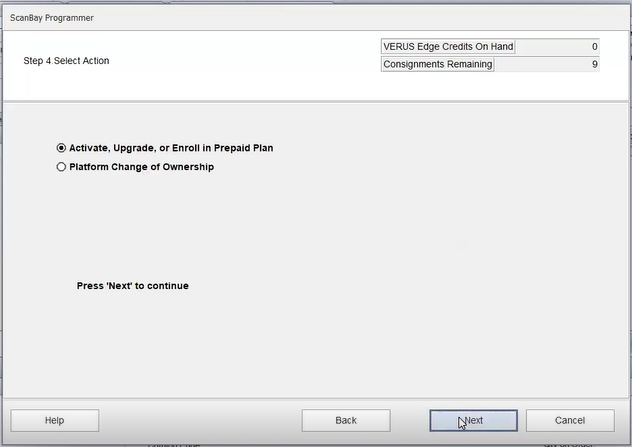
| 6. | Continue to follow the prompts, and select "Activate, Upgrade or Enroll in Prepaid Plan" at the prompt, then select Next. |
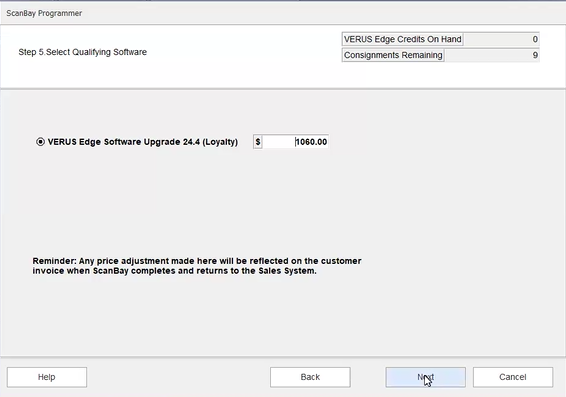
| 7. | Select the "Qualifying Software" choice from the available options displayed for the diagnostic tool (e.g.XX Diagnostic Tool Name - "Software Upgrade" - XX version number - "(Loyalty)") |
| 8. | Change the cost as needed, then select Next. |
| 9. | Follow the prompts, reviewing the sale terms and price, then select Next. |

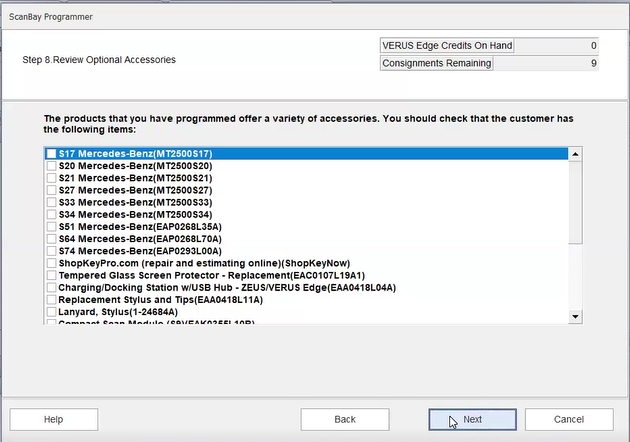
| 10. | Choose any "Add-ons' requested by the customer, then select Next. |
| 11. | Confirm the customer order information, then select Next . |
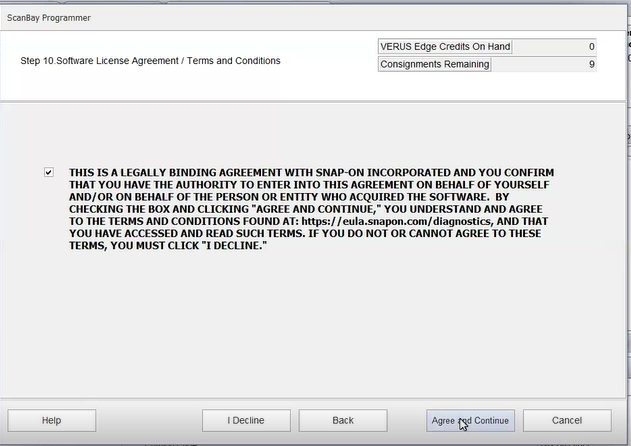
| 12. | Accept the EULA, and then select Agree and Continue. |
| 13. | Check the order information onscreen before continuing. |
At this point you have the option to program the platform Now or Later.
| ● | to program Now, select Program Now and proceed to Step 14 |
| ● | to program Later, select Program Later and continue to read the following information |
| – | Program Later allows the customer to download and install the upgrade directly on their platform at a later time. |
| – | Your Chrome/ScanBay PC must have an Internet connection to proceed using the Program Later option. |

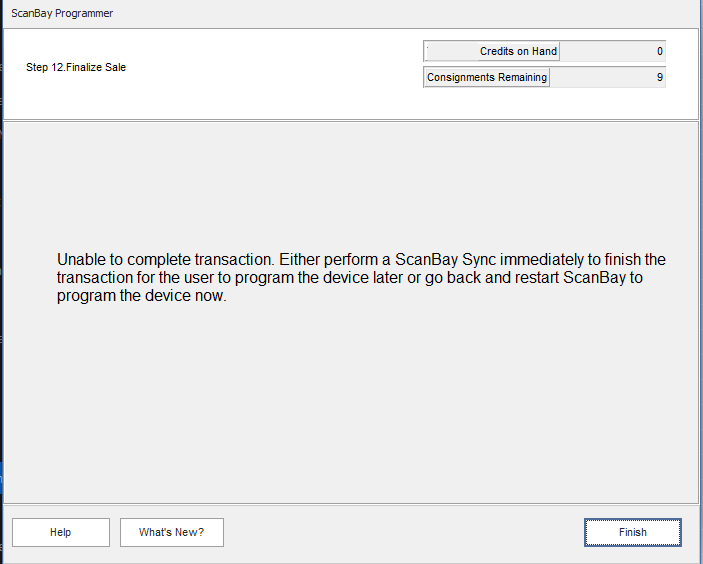
If you chose Program Later and had a successful Internet connection, ScanBay will finalize the transaction.
Stop - This concludes the upgrade process. Select Finish to return to the Chrome Sales System
If you did not successfully connect to the Internet, an error message will display.
To resolve the issue, you can perform a ScanBay Sync and ensure you have an Internet connection.
If you cannot resolve the issue or connect to the Internet, you can restart ScanBay and restart this process and choose Program Now.
| 14. | Programing Now |
Select Program Now to complete the upgrade now and finalize the transaction.
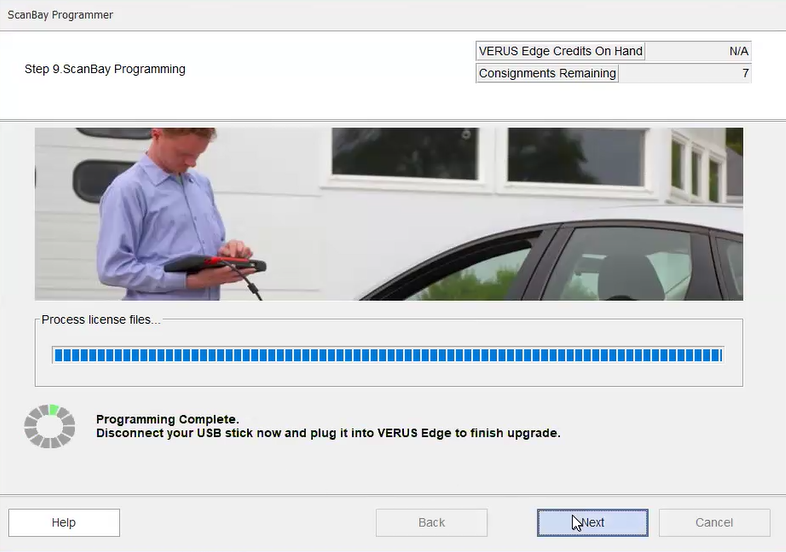
| 15. | Once programming is complete select Next |
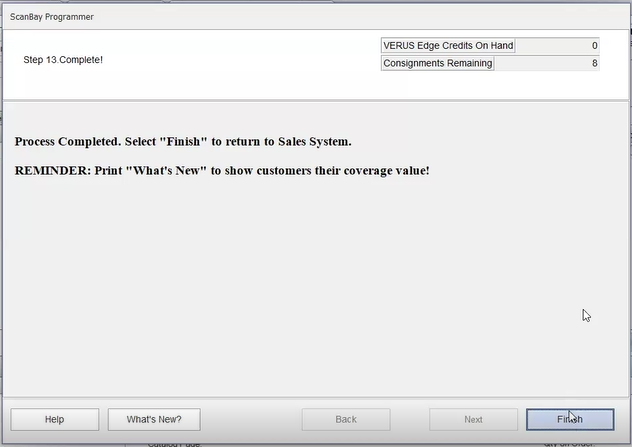
| 16. | Click and Print the 'Whats New" coverage value document and give it to the customer, then click Finish. |
The invoice will now show the product number and description along with a total cost.
| 17. | Remove the USB stick from the Chome PC. and insert it back into the same diagnostic tool. The diagnostic tool must be the same one that was used in the USB Stick Configuration process. |
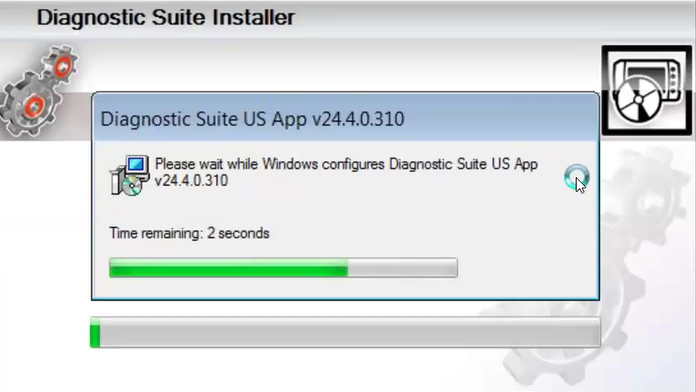
The Installer application "Auto-starts" when the USB stick is inserted into the diagnostic tool.
This application will update the software license and install the current software.
DO NOT remove the USB storage device at this time. Damage can occur to the diagnostic tool if the USB storage device is removed.
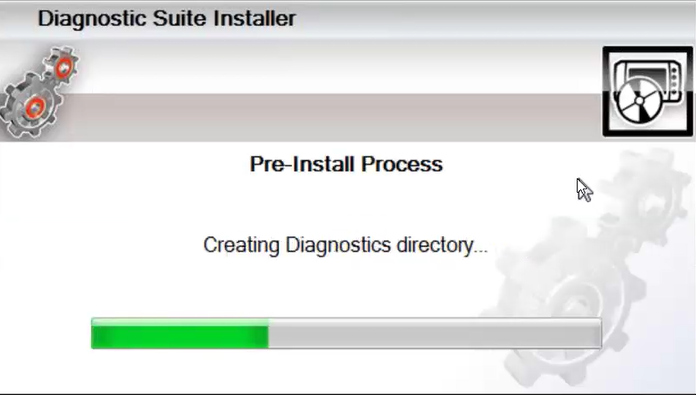
Status screens continue to display until the upgrade is complete.
Once prompted that the installation is Complete, select OK to finish.
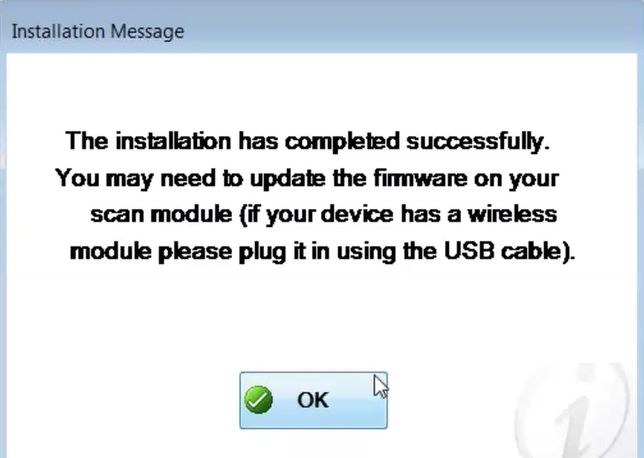
When finished , the diagnostic software suite "Auto-starts"
| 18. | If prompted, perform the Scan Module Firmware Update. NOTE: If an update is not needed, no prompt is displayed. |
| 19. | Remove the USB Stick from the diagnostic tool. |


