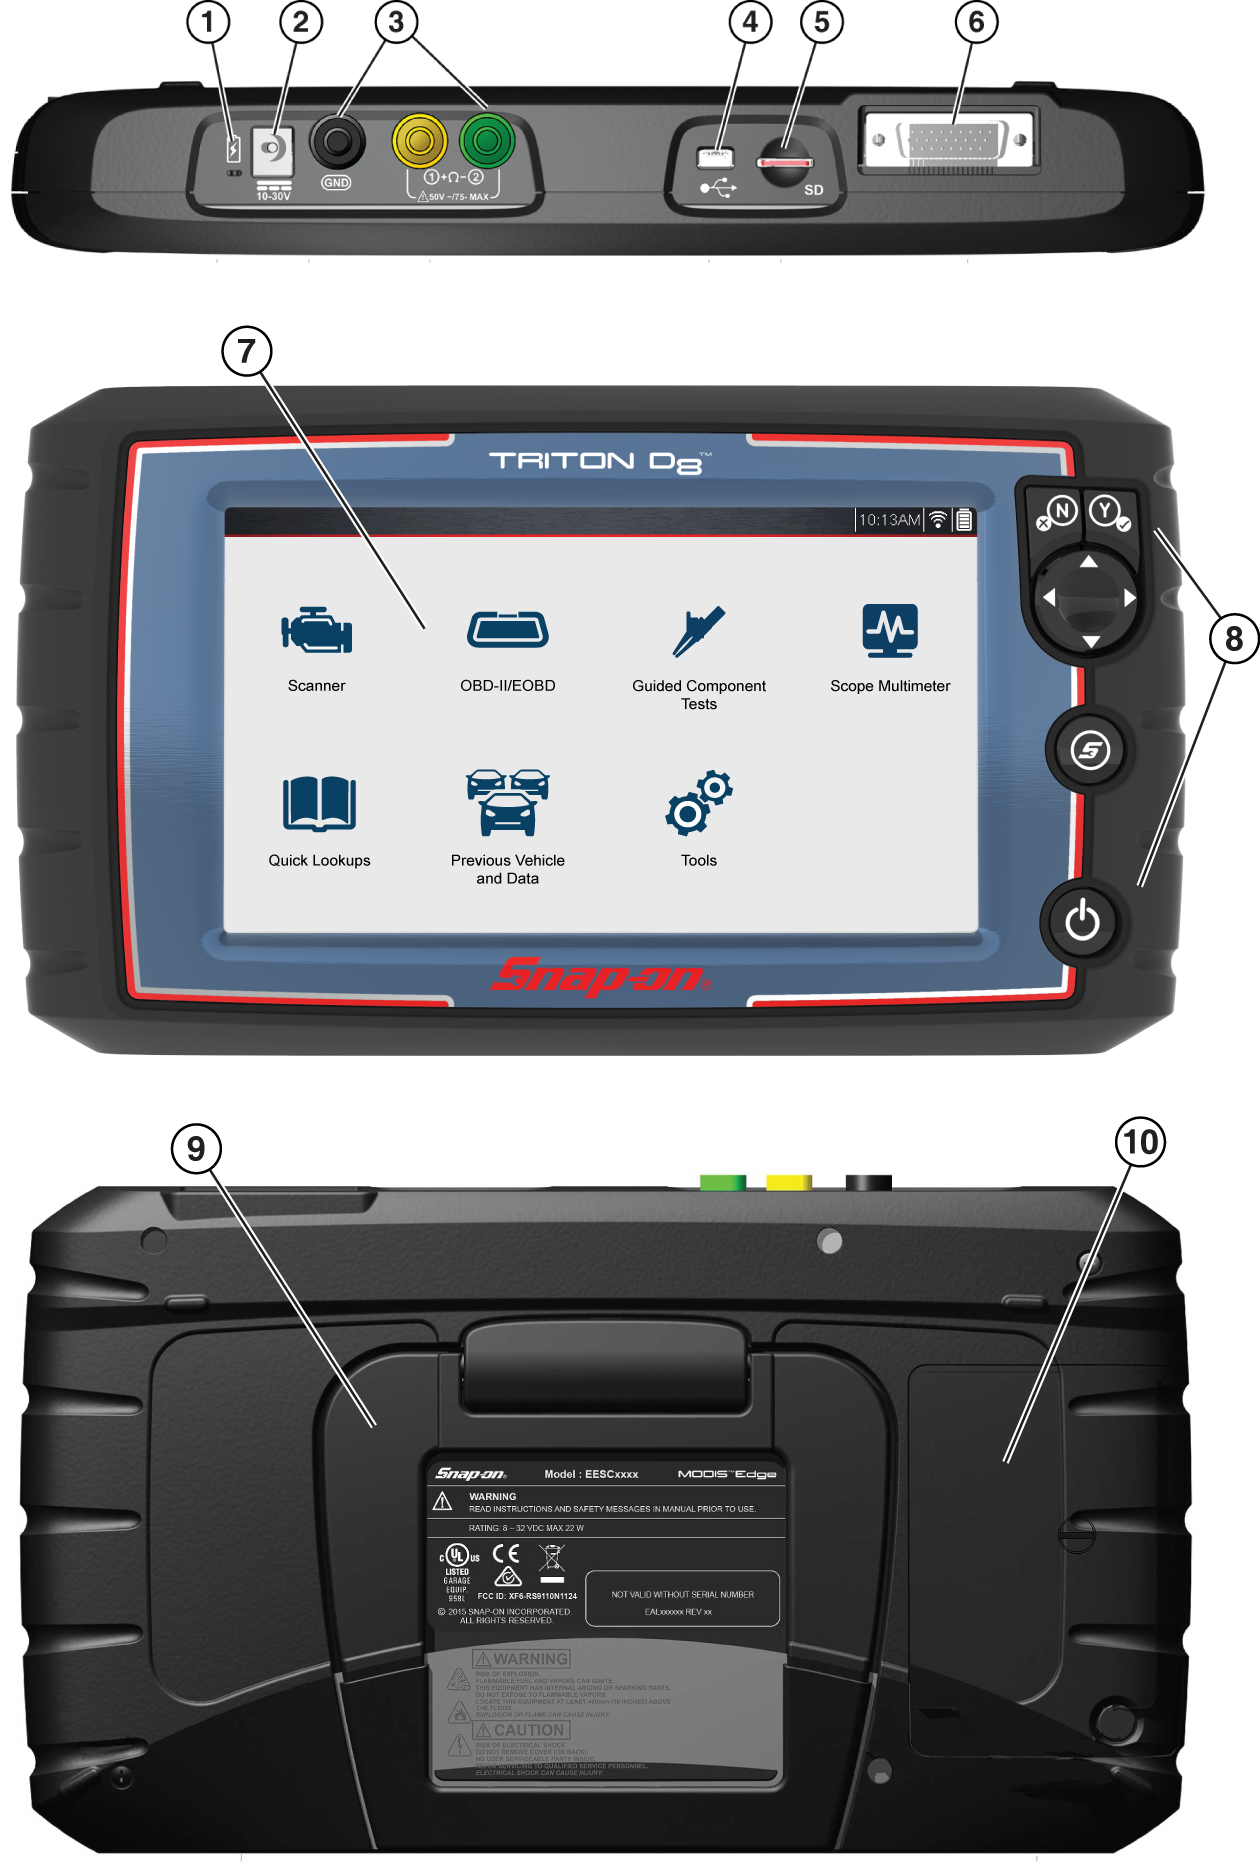
There are four “push type” control buttons and one “thumb pad rocker type” multi-directional button located on the right side of the diagnostic tool. All other diagnostic tool operations are controlled through the touch screen.
Touch screen controls are used for most operations, however the control buttons may also be used to navigate and select functions.


The Home screen includes a title bar and main body. The Home screen contains the primary diagnostic tool function icons.
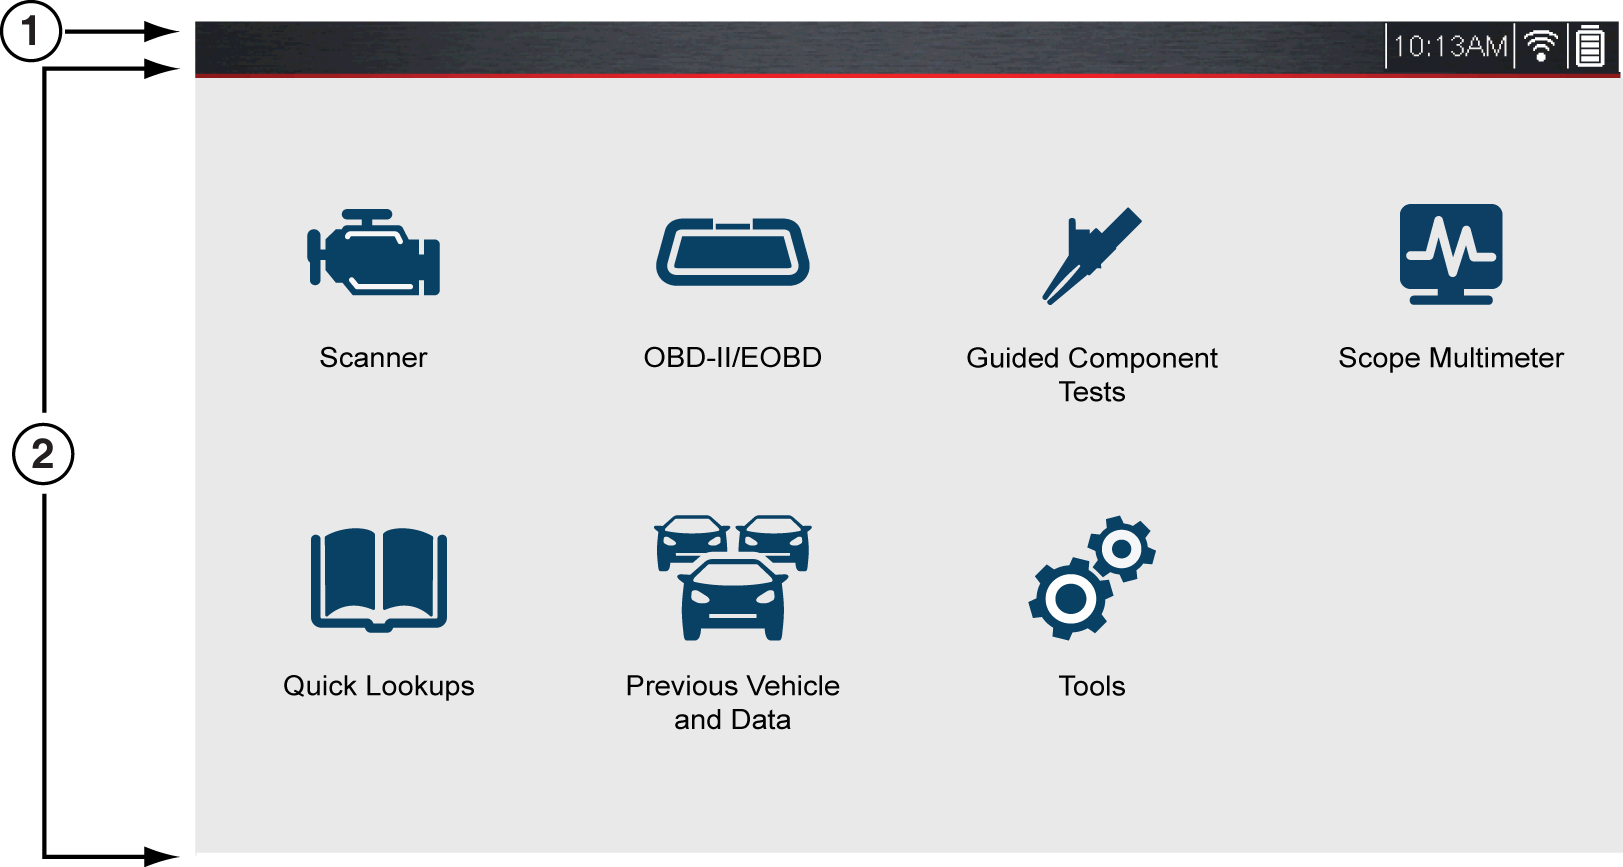
| 1. | Title Bar |
| 2. | Main Body |
Title Bar
The title bar at the top of the screen provides basic information about current diagnostic tool operating conditions. Title bar options vary depending upon vehicle make and model, what function is active, what test is being performed, or what menu is selected. The title bar contains information only, there are no selectable items.
Elements of the Title bar let you know at a glance:
| ● | Which diagnostic tool function is active |
| ● | The current time |
| ● | Wi-Fi signal strength |
| ● | The source and status of the power being supplied to the diagnostic tool |
A real time clock displays to the left of the power supply icon. The clock is powered by a dedicated internal battery, so the correct time is maintained even when the main battery pack is discharged. Use the Tools function to set the clock and format how time is displayed.
The Title bar displays other information that varies depending upon what functions are being performed. Other information may include:
| ● | The identification (ID) of the test vehicle |
| ● | The name of the active menu or function |
| ● | The name of the test being performed |
|
Icon |
Function |
Icon |
Function |
|
|
Full Battery Charge Level - Indicates power is being supplied by the internal battery pack. Horizontal bars diminish as the battery discharges. |
|
External Power Connected - Indicates power is being supplied through the data cable connection to a vehicle or by the AC Power Supply and charging the battery pack. |
|
|
Low Battery Charge Level - Indicates the internal battery pack is low and needs to be recharged immediately. A warning message will also display on the screen when the battery gets low. |
|
Wi-Fi Signal Strength - Indicates signal strength of the wireless network connection. |


Each available diagnostic tool function is represented by a icon on the Home screen. Select an icon from the Home screen to start a function. You can also use the control buttons to select an icon. Use the directional button to highlight the desired function and then press the Y/Accept to select it.
|
Function Name |
Function Icon |
Description |
|
Scanner |
|
Used to communicate with the electronic control systems of a vehicle. This function allows you to retrieve diagnostic trouble codes (DTCs), view PID data and perform diagnostic tests. |
|
OBD-II/EOBD |
|
Allows you to access generic OBD-II/EOBD data and tests without identifying the vehicle being tested. |
|
Quick Lookups |
|
Provides quick access to the OEM Oil Specs and Resets and Tire and Wheel Service information and TPMS functions. |
|
Previous |
|
Allows you to quickly reconfigure the diagnostic tool to a recently tested vehicle and to access saved data files. |
|
Guided Component Tests |
|
Allows you to access preconfigured meter tests and reference information. |
|
Scope Multimeter |
|
Allows you to perform multiple types of circuit and component measurement tests. |
|
Tools |
|
Allows you to adjust diagnostic tool settings to your personal preferences and perform other special functions. |


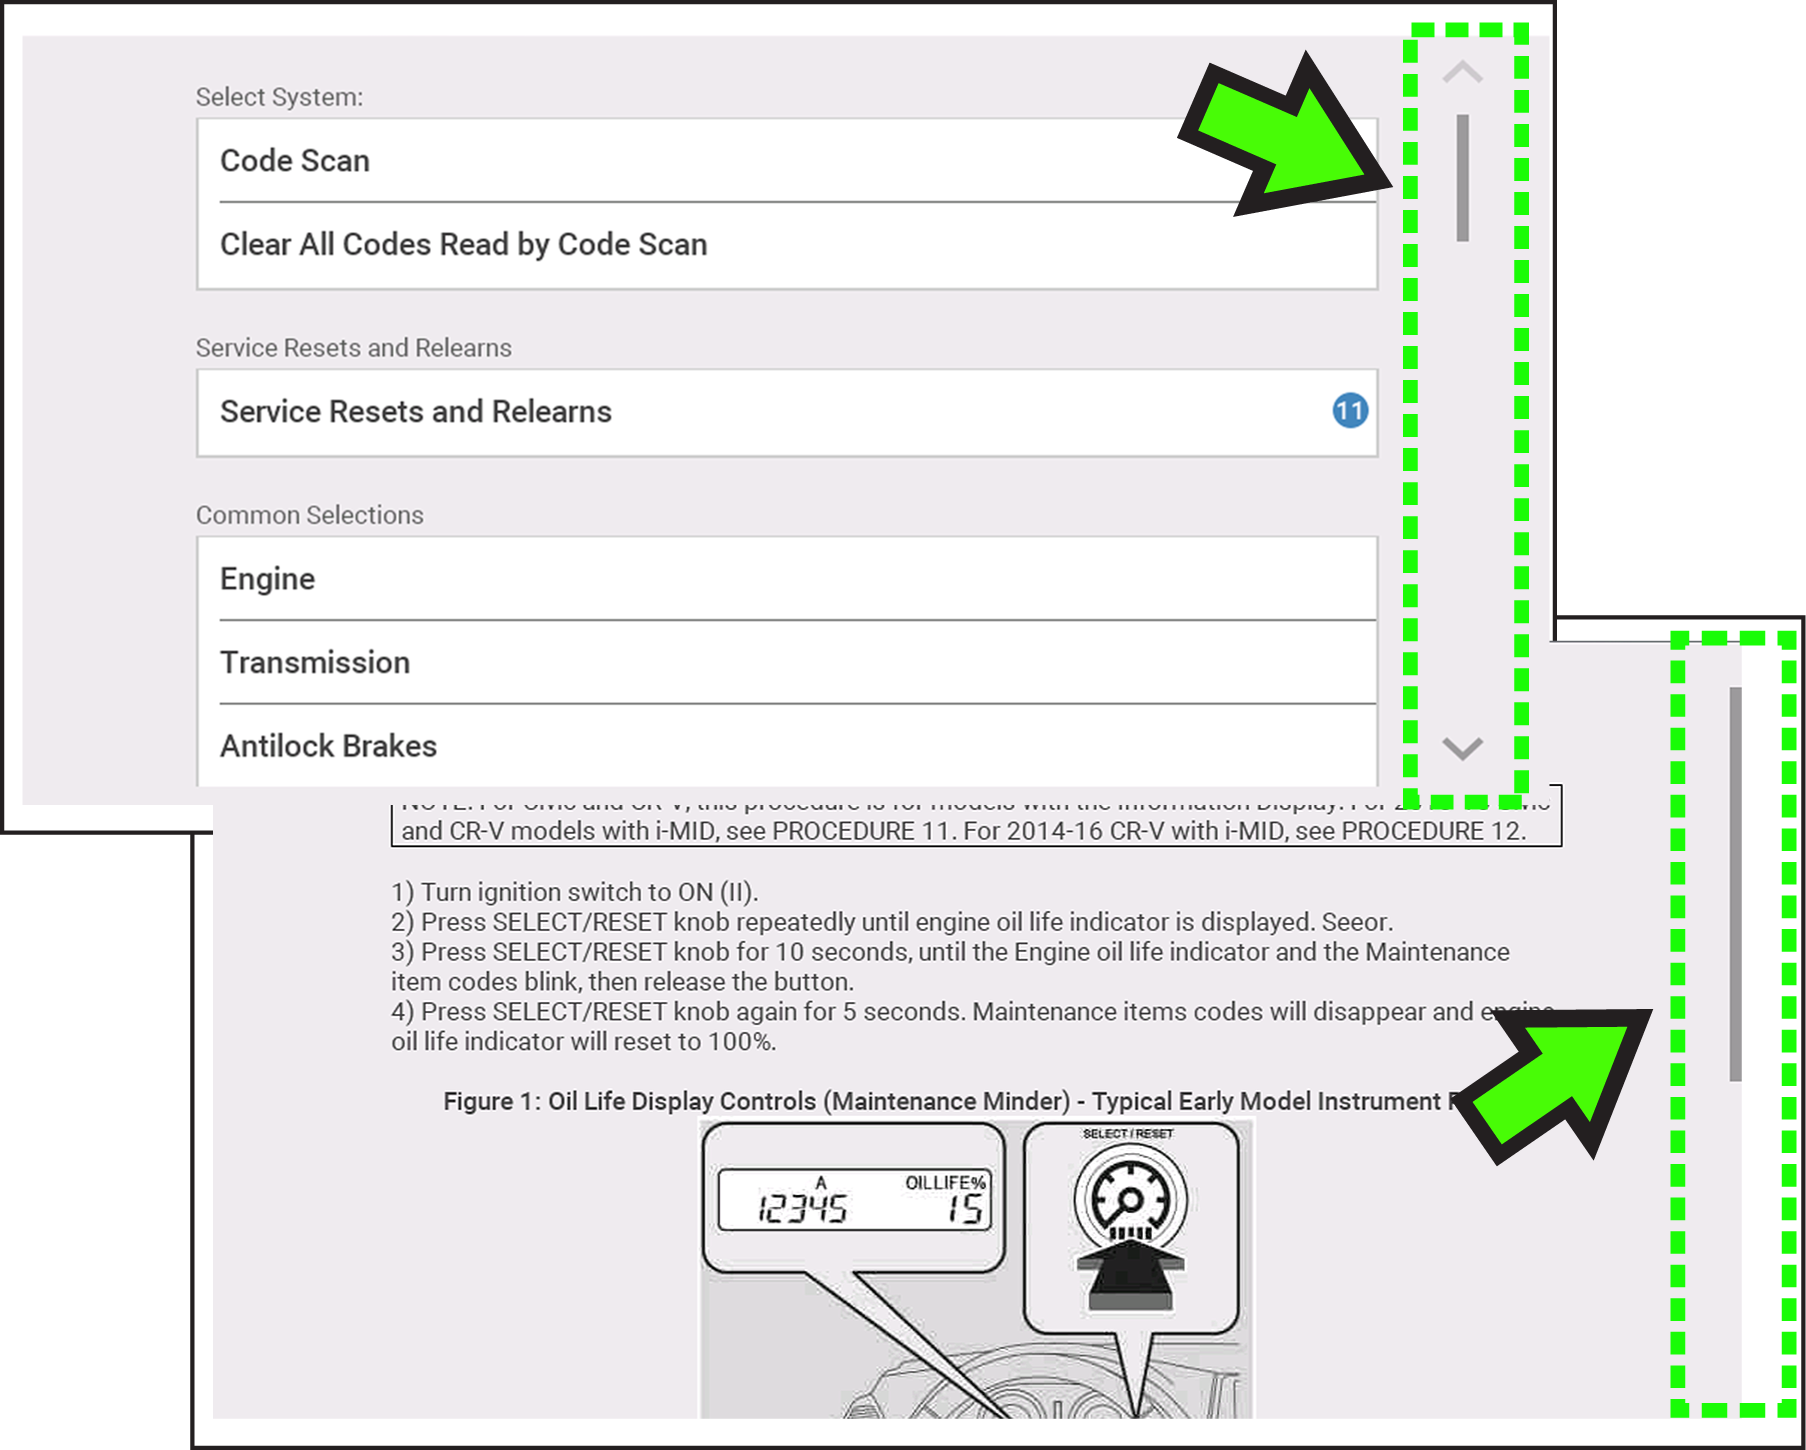
Onscreen scrolling controls are displayed (when applicable) to move screens up/down to view additional content. Scroll control icons display on the right-side of the screen, and may vary in appearance as shown below.
Multiple operation methods are:
| ● | Touch the up/down arrow icons |
| ● | Swipe the screen up/down using your finger |
| ● | Use the up/down directional control buttons |